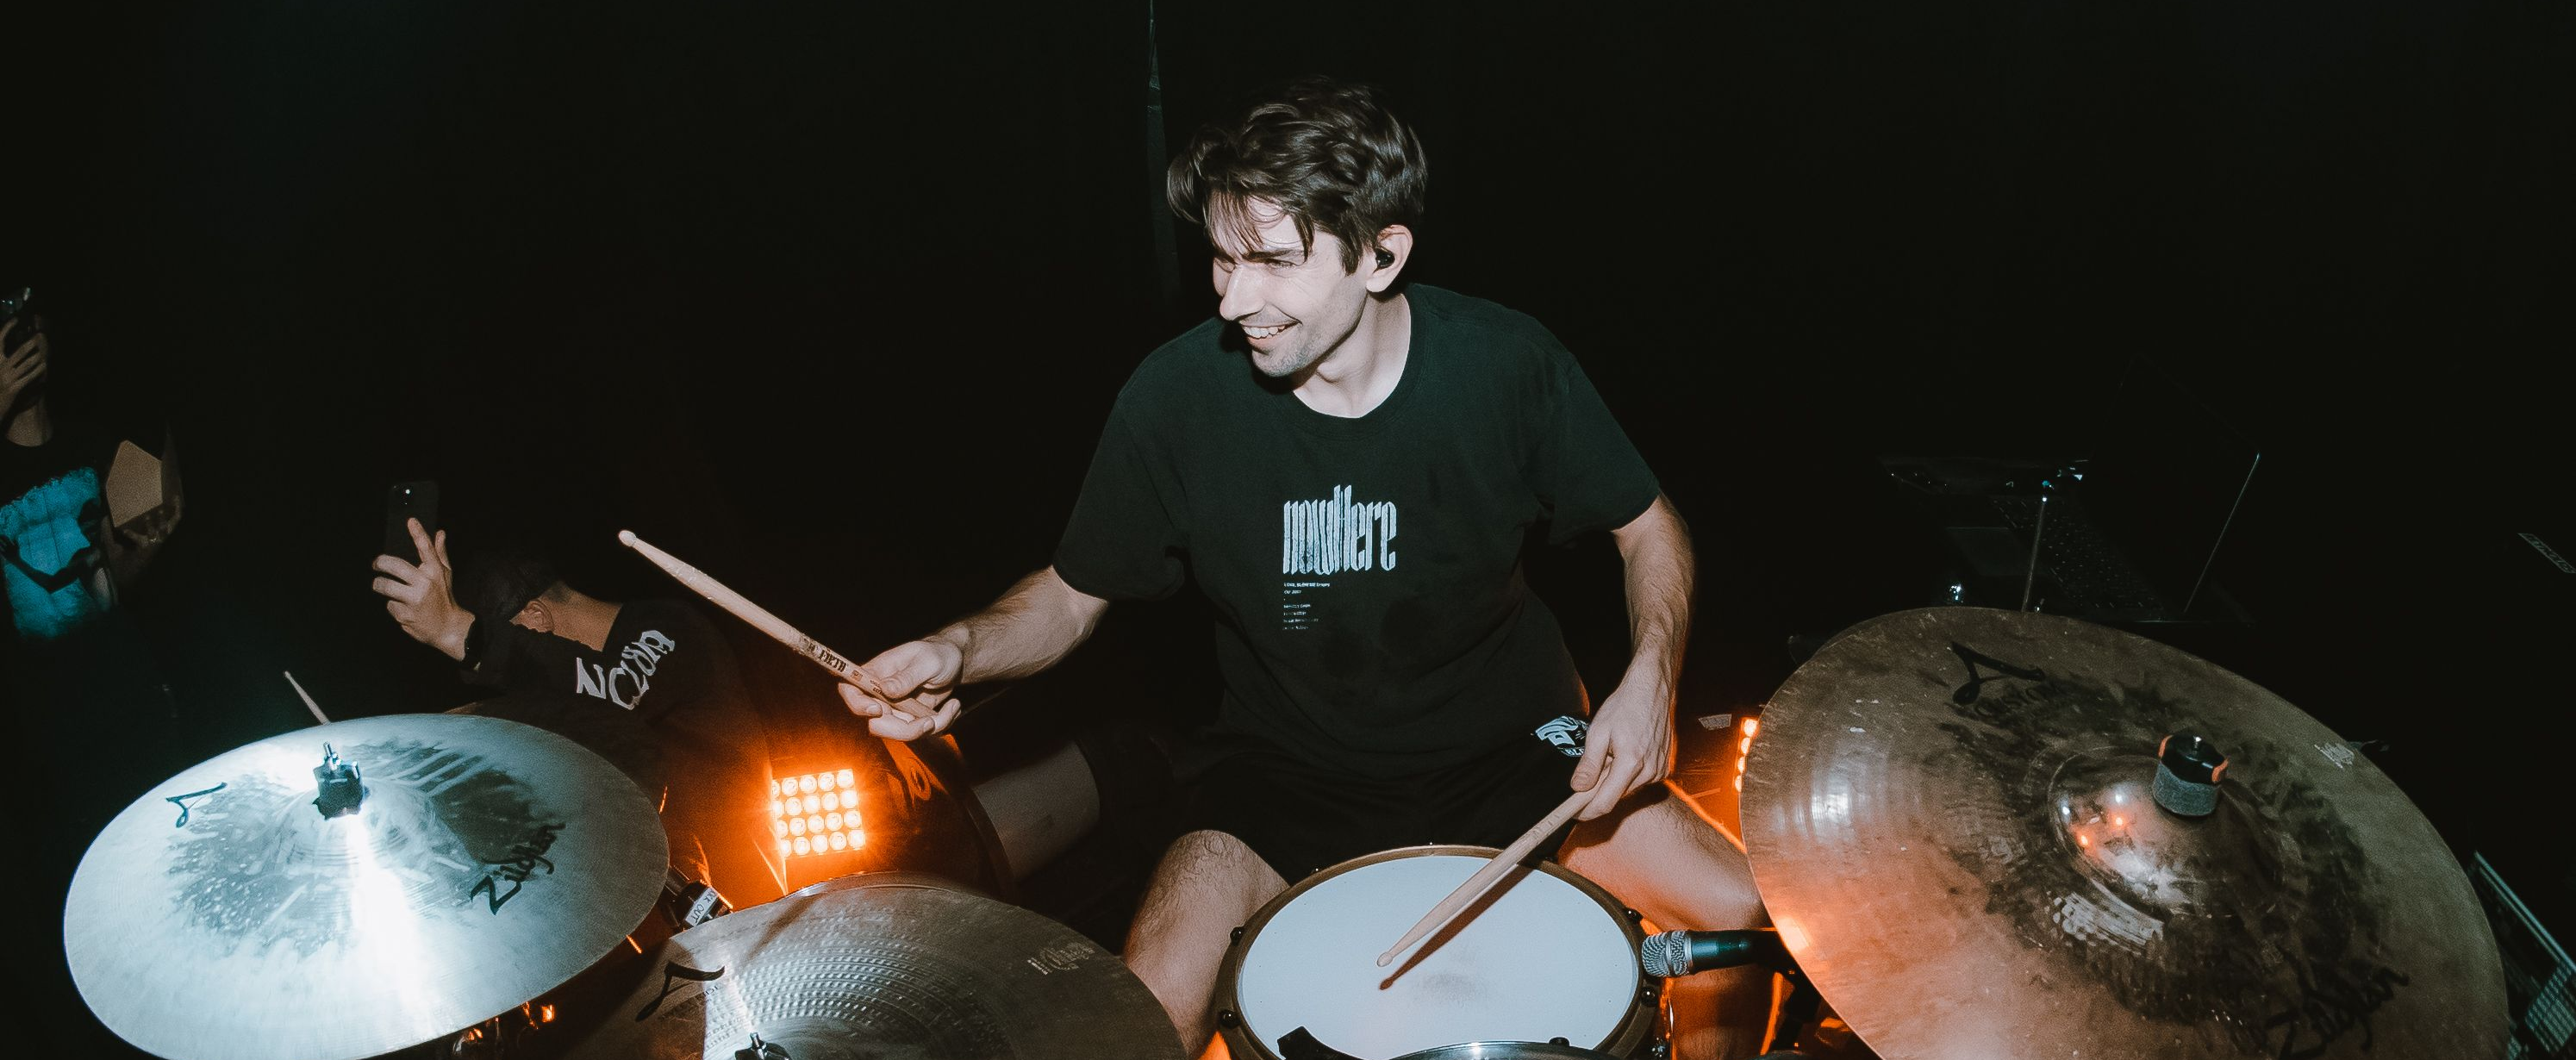
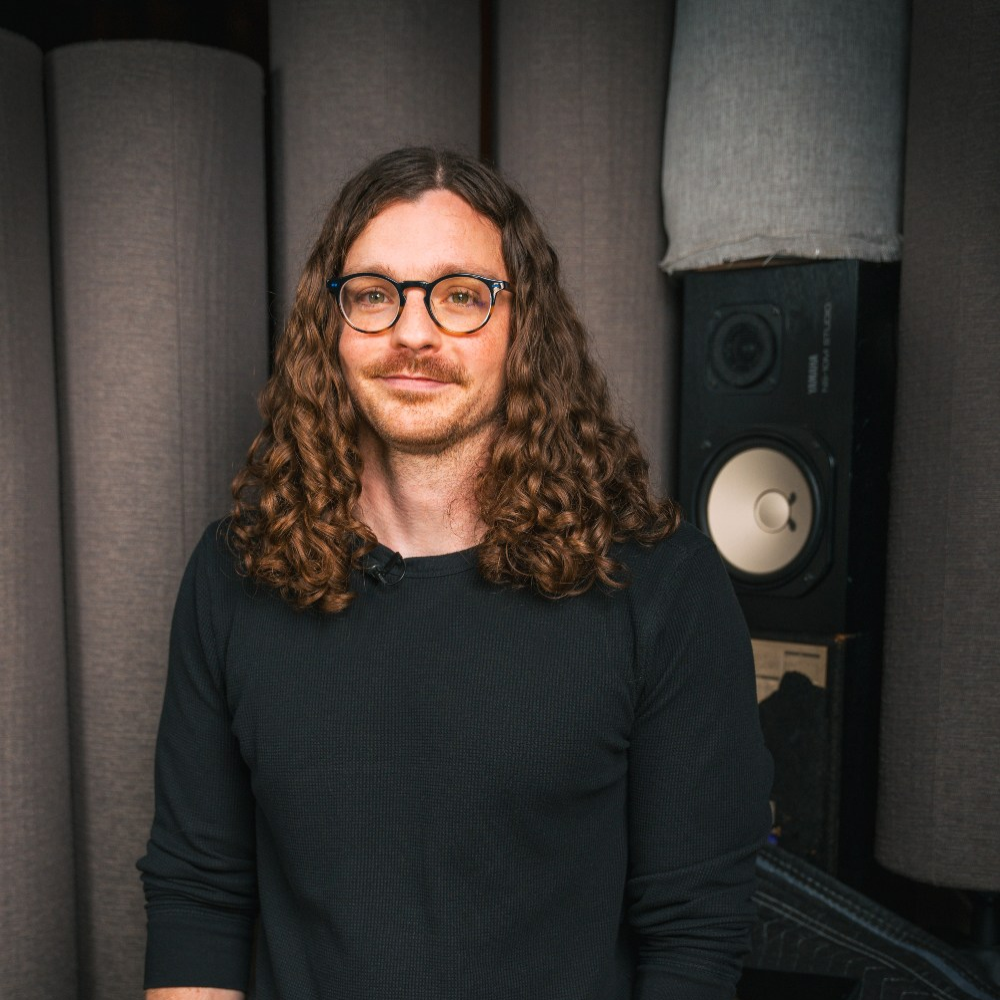
If there’s a perfect representative for the term ‘jack of all trades,’ it’s Kyle Brownlee.
Brownlee is the drummer of the metalcore band Counterparts and founder of Soundblind Drums, his pandemic project turned legitimate business that captures all the depth and dimension of his devastatingly heavy drum kit. Oh, and he plays guitar too.
Since he started drumming as a child, Brownlee has found success as a recording artist, a songwriter, a plugin programmer, a sound designer, a YouTuber, and a Rock Band gamer. Somehow, he was able to find time in his busy schedule to talk to us about his past, his present, and what his future (hopefully) holds.
—
Kyle in action on the road.
Drew Van Buskirk: Let’s kick it off real easy. Tell us a little about yourself. Who is Kyle Brownlee?
Kyle Brownlee: Oh I don’t know–I’m just a guy who plays drums in a screaming band and also makes little plugins and sample packs here and there.
DVB: Take me back to the beginning: where did your musical journey start?
KB: I think the breakthrough was my cousin, who was a drummer and instrumentalist. I came over to his house one day, saw his drum kit, and thought, “OK, that’s kind of sick. I want to do that.”
DVB: Do you remember how many pieces the kit was?
KB: He had a decently sized kit. I think it had three rack toms, maybe two floors, a bunch of cymbals, but what really sold me was the double-kick pedal. That blew my mind.
DVB: Talk about formative memories. When did you join your first band?
KB: I started my first band with my friend Billy in the 9th or 10th grade. It was called Majesty, named after a Black Dahlia Murder live DVD. We played for a few years and actually weren’t terrible! I’m still proud of that.
DVB: Stealing the names of favorite albums or songs for your own band’s name felt like a rite of passage in high school, especially in the MySpace era.
How long after Majesty did Counterparts come into play?
KB: So, there’s a running joke among fans: ‘Who hasn’t been in Counterparts?’ I first filled in for them in 2012 when they were looking for a drummer after their original drummer left. At that point, I was transitioning from doing video game stuff on YouTube to real drum content. I put a cover of one of their tracks on YouTube, and Kenny, their merch manager, saw it. They hit me up, and I filled in for their headline tour.
DVB: When did you officially join the band?
KB: I fully joined in 2016. So, it’s been eight years now, which is insane to think about.
DVB: Time flies when you’re having fun! What Counterparts records can we hear you on?
KB: I started with “You’re Not You Anymore” in 2017. I’ve been on three full lengths: “You’re Not You Anymore,” “Nothing Left to Love,” and “A Eulogy for Those Still Here,” plus all the EP and B-side stuff from those sessions.
DVB: Even considering your previous experience with the group, what was the writing process like for you as a new member of a pretty well-established band?
KB: It’s a mix. When I filled in in 2012, I had to learn the songs note for note because they were so intricate. Now, we do drums last when recording, so I have time to sit with the demos and adjust stuff. I have more creative freedom now to do something crazy and put my own spin on it
DVB: Do you have any favorite records or tracks that you’ve worked on?
KB: Some of the sleeper hits on “Nothing Left to Love” and “A Eulogy for Those Still Here” are really cool. ‘Sworn to Silence’ is a favorite where I kind of ripped off one of my favorite bands. [Editor’s Note: We didn’t ask Kyle to snitch on himself here. Whoever he ripped off is none of our business.]
The current faces of Counterparts: Kyle, Brendan Murphy (vocals), Tyler Williams (bass), and Jesse Doreen (guitar)
DVB: You mentioned a moment ago that before your drum videos, you were making video game content. Could you elaborate on that?
KB: Yeah, I played the game Rock Band as a professional gamer. It was legitimately my job when I was in high school.
DVB: Wow, that’s incredible. How did that start and eventually transition into YouTube?
KB: It all began when Rock Band came out. I remember playing it at a friend’s house, probably after skipping school that day just to try it out. I thought, “I can play drums; this is going to be easy and fun.” But I actually sucked at it initially. So, I bought the game and every day after school, I would grind it out until I got to the point where I was number one on the leaderboard.
DVB: How did your experience with Rock Band videos translate to YouTube?
KB: Back then, YouTube was still in its early stages, especially for rhythm games. My videos would get pushed up in the algorithm and gain a lot of traction. I used a small, crappy digital video camera and taught myself some basic editing software to add overlays. I was just in my basement playing Rock Band, and I realized that if I could do this for a video game, I could probably do it for real drums too, showing people that I wasn’t just a guy hitting a plastic kit.
DVB: Was your audience receptive to that transition from Rock Band videos to real drum cam videos?
KB: There was definitely a drop-off because some people were there for the specific type of content. That said, I still have fans who have followed me from those early days. Sometimes, at shows, people come up to me and recognize me by my old Xbox Gamertag. It’s cool to see that long-time support.
DVB: What ultimately got you into production and eventually creating sample packs?
KB: After going to the studio for the first time with my high school band, I thought I could figure it out. I struggled in front of Reaper for a long time, learning from YouTube. Eventually, I started making drum tracks by chopping up sections of songs. During the pandemic, with no shows or touring, I went to the studio, filmed drum playthroughs, and decided to sample my kit. It started as something for me to use when writing Counterparts songs but evolved into Soundblind.
DVB: That’s a perfect segue: what is Soundblind?
KB: Soundblind is my project for creating drum sample packs. During the pandemic, I had a lot of time, so I went to the studio and sampled my kit. I didn’t have a mentor or guide, so I learned by doing, figuring out how sample packs work. It evolved from there, and now it’s something I’m really proud of.
DVB: What was your approach when you first started creating these sample packs?
KB: I kind of went in blind. (laughs) I knew what I wanted but had no idea how to achieve it. I spent a lot of time researching, watching YouTube tutorials, and trial and error. Eventually, I figured out how to get the sounds I wanted and started building my packs from there.
DVB: What’s the response been like so far?
KB: It’s been overwhelmingly positive. I think people appreciate the attention to detail and the effort I put into making them as high quality as possible. It’s been really rewarding to see other musicians using and enjoying something I created.
DVB: Have you collaborated with any other artists or producers on your sample packs yet?
KB: Not yet, but I’m definitely open to it. I think collaboration can bring new perspectives and ideas to the table, which is always a good thing. I’m excited to see where Soundblind goes in the future.
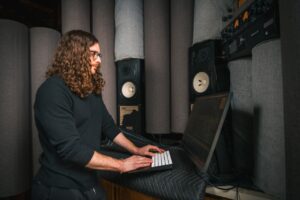
DVB: Since we’re getting into production-talk, I’d love to know how you use Slate Digital plugins in your day-to-day workflow.
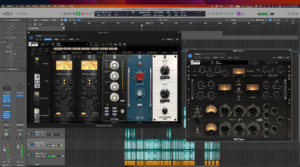
Kyle’s first step on every channel: Virtual Mix Rack and VCC Channel.
KB: Oh, absolutely. I use Slate Digital plugins extensively. My starting template for every track is built around Slate Digital’s Virtual Mix Rack (VMR) with the Virtual Console Collection (VCC).
A big part, if not all, of my drum sound for live drum cams and studio work comes through Slate Digital stuff. Every single track’s baseline processing is VMR with VCC. I’m printing saturation through VCC immediately; that’s the first step I do for every track.
I also stack two VCC instances on every channel, cranking the drive with the Brit 4K and Brit N consoles, just really hammering my tracks. And the Gates in VMR are untouchable—they’re the best gates you can use.
The Custom Series EQ and FG-Stress are huge go-tos for me, too. The Custom Series EQ is incredibly effective and often overlooked, but it adds so much with minimal effort. The Virtual Buss Compressor (VBC) rack is on every shell bus; sometimes I’m not even running it as a compressor, I’m just using its analog recreation. Slate Digital plugins are literally all over my tracks, from the kick drum to the master bus.
DVB: It sounds like you have a pretty firmly established and natural workflow, it’s very exciting to know that we’re such a big part of it.
KB: Definitely. Even before the subscription model, I would buy every new plugin because they consistently provide the best sound quality. The new SD-PE1 is great, too, especially the low end, which really stands out compared to others I’ve used.
Some of Kyle’s go-to guitar processing plugins.
DVB: Ok, I’ve kept you long enough—I think we should wrap up this lovely conversation with some words of wisdom. What advice would you give to aspiring drummers or musicians?
KB: Just keep at it. It’s a long and often difficult journey, but if you’re passionate about it and willing to put in the work, it’s incredibly rewarding. Don’t be afraid to make mistakes and learn from them. And most importantly, have fun with it. Music is supposed to be enjoyable, so don’t lose sight of that.
DVB: Any other parting words you’d like to share?
KB: Just a big thank you to everyone who’s supported me and Counterparts over the years. It’s been an amazing journey, and I can’t wait to see what the future holds. And if you haven’t checked out Soundblind yet, give it a look. I think you’ll like what you hear.
DVB: Thanks so much for your time, Kyle. It’s been great chatting with you.
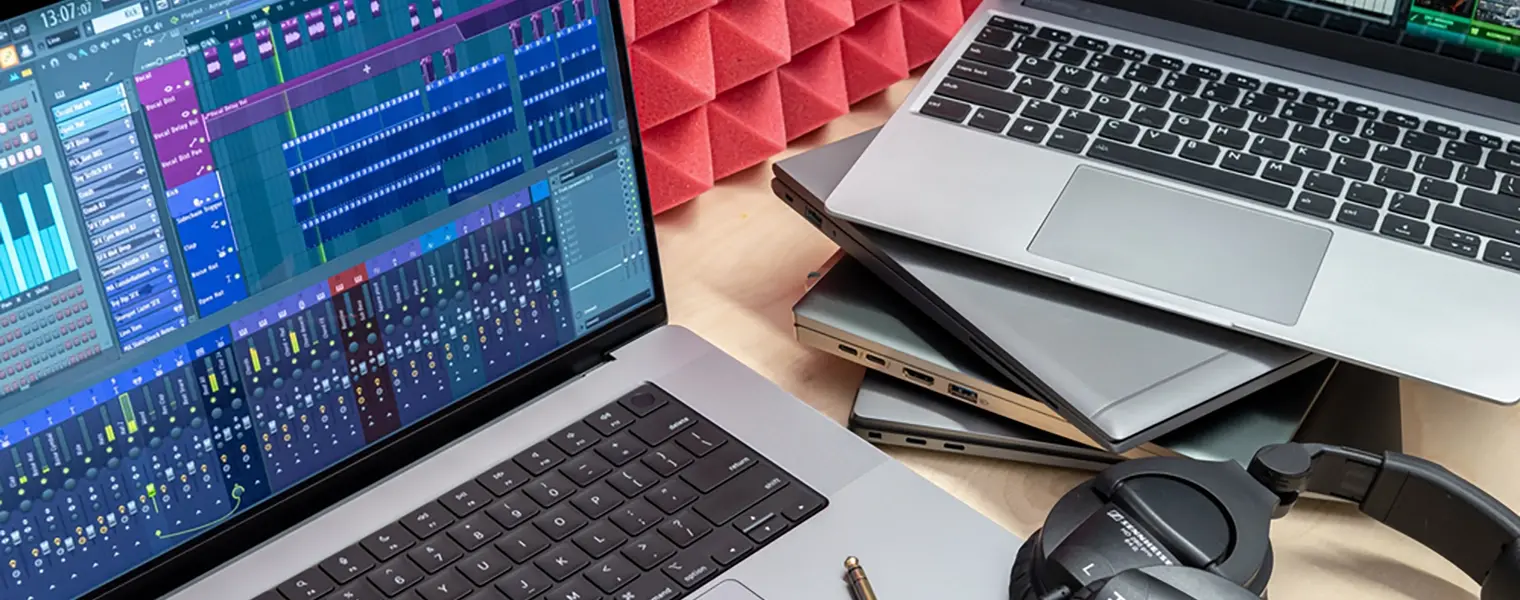
The Apple MacBook Pro M3 16” and Dell XPS 17 (9730) are top choices for overall powerful and reliable music production laptops, catering to both macOS and Windows users.
Mid-range options like the Apple MacBook Air M3 and Lenovo Yoga 7i 16 (2023) offer a balance of performance and affordability, making them suitable for music producers on a budget.
Key features for an optimal music production laptop include a powerful processor (Intel Core i7/i9 or AMD Ryzen 7/9), at least 16GB of RAM, and SSD storage, along with considerations for screen size, battery life, and port availability.
Searching for the best laptop for music production? Look no further. In this article, we break down the top laptops based on performance, reliability, and budget to help you pick the perfect one for your music production needs.
Best Overall Laptops for Music Production
When it comes to music production, the best overall laptops need to combine power, performance, and reliability. The Apple MacBook Pro M3 16” stands out as the best laptop for handling intensive music production tasks, ensuring you have the tools to create professional-quality music, while the Dell XPS 17 (9730) offers a robust Windows alternative.
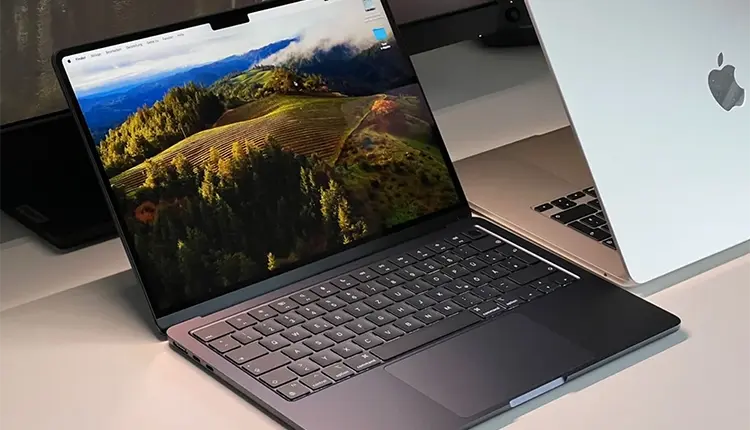
Apple MacBook Pro M3 16″
The Apple MacBook Pro M3 16” is a dream come true for music producers. It offers:
Liquid Retina XDR display for stunning visuals
M3 chip for incredible performance
Ability to run multiple DAWs, virtual instruments, and plugins without a hitch
This makes it the best overall choice for a music production laptop.
However, you might wonder if you’re paying for graphical performance you don’t need. While the MacBook Pro M3 16” is indeed a powerful machine, its price tag reflects its capabilities. If you’re looking for the perfect laptop to handle any music production task you throw at it, this is the one to beat.
Dell XPS 17 (9730)
For Windows enthusiasts, the Dell XPS 17 (9730) is a top contender. Its features include:
17-inch display, perfect for intricate mixing projects
Ability to monitor multiple tracks simultaneously without feeling cramped
Stellar performance, thanks to Intel’s 13th gen Raptor Lake-H series processors
These features make it an excellent choice for handling demanding workflows with ease.
Moreover, the Dell XPS 17 offers a significant screen real estate advantage, making it an excellent choice for music producers who prefer a larger screen. This laptop provides the power and flexibility needed for complex audio projects, making it one of the best laptops for music production on the Windows side.
Best Mid-Range Laptops for Music Production
If you’re looking for a balance between performance and affordability, mid-range Apple laptops are your best bet. The Apple MacBook Air M3 and Lenovo Yoga 7i 16 (2023) are standout choices in this category. These laptops offer significant power for music production tasks without breaking the bank, making them ideal for both aspiring and seasoned music producers.
Apple MacBook Air M3
The Apple MacBook Air M3 is an excellent option for music production on the go. Its features include:
Lightweight and ultra-sleek design for easy portability
Fanless architecture for silent operation during recording sessions
15-inch Retina display for ample screen real estate for managing your DAW and plugins effectively.
Despite being a more affordable option, the MacBook Air M3 doesn’t compromise on performance. It offers a robust experience for music producers who need a reliable laptop without the hefty price tag of a MacBook Pro. This makes it a fantastic choice for those who require a portable yet powerful music production laptop.
Lenovo Yoga 7i 16 (2023)
The Lenovo Yoga 7i 16 (2023) stands out as a versatile 2-in-1 laptop that caters to various music production needs. Its convertible design allows you to use it as a tablet, making it easy to view music sheets and other documents in different modes. This flexibility can be particularly beneficial for live performances or composing on the go.
Additionally, the Lenovo Yoga 7i 16 supports pen input and includes a stylus, which is especially useful for those who frequently use music notation software. Its large display provides plenty of screen real estate for viewing tracks and tools, making it a great mid-range option for music producers.
Best Budget Laptops for Music Production
Navigating the budget segment can be challenging, but there are still great laptops that offer decent performance for music production.
The ASUS Vivobook 16 M1605 (2023) and Acer Swift X14 are two gaming laptops that provide solid functionality without breaking the bank.
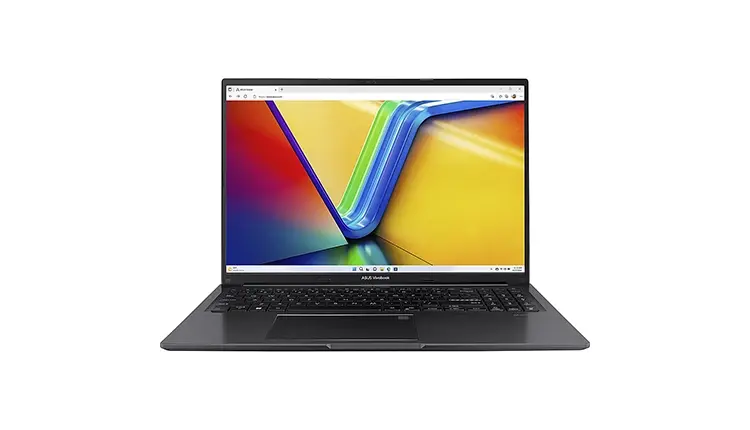
ASUS Vivobook 16 M1605 (2023)
The ASUS Vivobook 16 M1605 (2023) is a commendable budget option for music production. It features an AMD Ryzen CPU, which delivers decent performance for handling various music production tasks. The laptop also includes a full-size keyboard with a Numpad and a large touchpad, enhancing usability.
However, there are some compromises to be aware of. The display brightness may be limited in sunny environments, and the USB-C port does not support video output. Despite these drawbacks, the Vivobook 16 offers good battery life of around eight hours, making it a reliable choice for music producers on a budget.
Acer Swift X14
The Acer Swift X14 is another budget-friendly option that impresses with its portability and performance. Its slim design makes it a highly-portable, more compact laptop, ideal for music producers who need to work on the go. The powerful CPU ensures that it can handle demanding music production tasks without a hitch.
One of the standout features of the Acer Swift X14 is its OLED screen, which offers vibrant colors and crisp visuals. This is particularly beneficial for long, eye-straining sessions in DAWs like Ableton Live. Although the battery life may be limited, the Swift X14 remains a strong contender in the budget category.
Best Portable Laptops for Music Production
Portability is a crucial factor for music producers who often work on the move. The MacBook Air M3 and Microsoft Surface Pro 9 are two excellent choices that combine lightweight design with powerful performance, making them ideal for mobile music production.
MacBook Air M3
The MacBook Air M3 is designed to offer significant power in a sleek and lightweight package. It boasts a performance uplift of 25% in Ableton Live and 30% in Logic compared to its predecessor, the M2 model. This makes it a fantastic choice for music production on the move, ensuring that you can work efficiently wherever you are.
With up to 18 hours of battery life, the MacBook Air M3 ensures you won’t run out of juice during long recording sessions or live performances. Its lightweight design and powerful performance make it an excellent portable option for music producers.
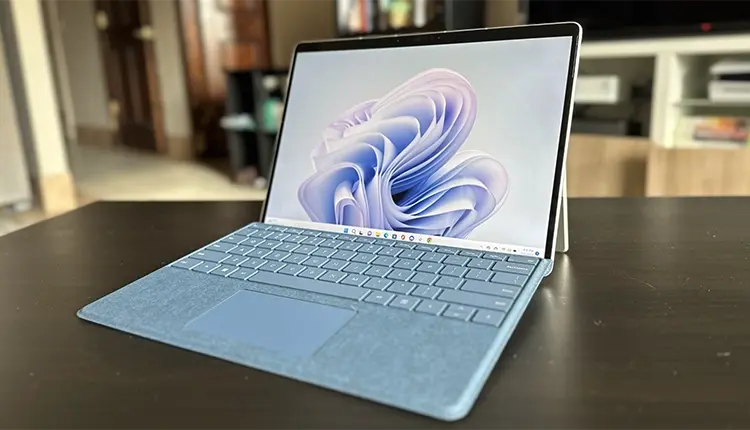
Microsoft Surface Pro 9
The Microsoft Surface Pro 9 is a versatile 2-in-1 laptop/tablet hybrid that is perfect for music production tasks. Weighing just 1.94 pounds, it is incredibly portable, making it easy to carry around for mobile production tasks. The ten-point multi-touch screen allows for easy adjustments without needing a mouse, adding to its convenience.
Equipped with a 12th gen i7 processor, 16GB RAM, and a 256GB SSD, the Surface Pro 9 offers the following features for music production:
High-performance processor
Sufficient RAM for multitasking
Fast and reliable storage
Flexibility to adapt to various production environments
These specifications make it a great option for music producers who need a powerful and versatile device.
Key Features to Look for in a Music Production Laptop
When choosing a music production laptop, certain key features can make all the difference. A powerful processor, adequate RAM, and fast storage options like SSDs are essential to ensure smooth and efficient workflows. These features are crucial for handling multiple tracks, plugins, and demanding audio processing tasks.
Processor Power
A powerful processor is the heart of any music production laptop, providing the necessary processing power for handling complex audio tasks. An Intel Core i7 or i9, or AMD Ryzen 7 or 9 processor is ideal for managing resource-intensive tasks like real-time audio processing and multiple effect plugins without lag.
Quad-core processors or higher are recommended for music production, as they provide the necessary power to run multiple DAWs and virtual instruments simultaneously. Processor clock speeds, typically ranging from 2.4 to 4.2 GHz, also play a significant role in ensuring smooth performance.
RAM Requirements
RAM is another critical component for music production. At least 8GB of RAM is necessary, but 16GB is ideal for seamless performance. Having sufficient RAM ensures that your laptop can handle multiple tracks and virtual instruments without slowing down, which is essential for complex audio projects.
Insufficient RAM can lead to system crashes and slow performance, especially when working on large audio projects. Therefore, investing in a laptop with adequate RAM is crucial for a smooth and efficient music production experience.
Storage Options
When it comes to storage, solid-state drives (SSDs) are the gold standard for music production laptops. SSDs offer faster data access and improved performance compared to traditional hard drives, making them ideal for loading large sample libraries and project files quickly.
For serious music production, a laptop with at least 512GB of storage is recommended. However, a combination of a smaller SSD for the operating system and programs, along with a larger HDD for storage, can be a cost-effective solution. This setup ensures you have the speed for daily tasks and ample space for storing extensive audio files and projects.
Mac vs. Windows: Which is Better for Music Production?
Deciding between a Mac and a Windows laptop for music production often boils down to personal preference, budget, and software compatibility. Macs are favored by many professional studios for their stability and the seamless integration of hardware and software. MacBooks, particularly the MacBook Pro, are known for their high-quality build, excellent displays, and powerful performance, making them a popular choice among music producers.
On the other hand, Windows laptops offer more variety in terms of hardware and price points. Windows users can choose from a wide range of laptops, from budget-friendly options to high-end machines like the Dell XPS 17. Additionally, many music production software programs are compatible with both operating systems, so your choice may ultimately depend on your familiarity and comfort with either Mac OS or Windows.
Additional Considerations for Music Production Laptops
Beyond the core specifications, several additional factors can significantly impact your music production experience. Screen size and quality, battery life, and port availability are all crucial elements that should be considered when choosing a music production laptop.
Screen Size and Quality
A high-resolution display with good color accuracy is essential for clearly seeing the DAW interface and plugins. Screen size affects the visual workspace; larger screens are better for managing complex productions, while smaller screens are more portable. For example, the 15-inch MacBook Air M3 offers significant screen real estate, making it easier to manage music production software.
Music producers should look for at least a Full HD (FHD) screen to ease long editing sessions. The Lenovo Yoga 7i 16 (2023) includes a large 16-inch display, providing ample space for viewing tracks and tools.
The MacBook Pro 16” M3’s Liquid Retina XDR display offers vibrant colors and deep blacks, ideal for detailed work.
Battery Life
Battery life is a critical factor for those who plan to work on-the-go. For mobile setups, lightweight laptops with better battery life, such as the MacBook Air M3, are beneficial. The MacBook Pro 16” M3 offers up to 17 hours of video playback on a single charge, making it ideal for long recording sessions or live performances.
The Surface Pro 9’s battery life is around 8 hours during intensive tasks, which is sufficient for most production needs but less than the quoted 15.5 hours. Longer battery life benefits users who record or perform in various locations without easy access to power. Ensuring your laptop can last through your longest sessions without needing a charge is crucial for uninterrupted creativity.
Port Availability
Having multiple ports is essential for connecting various audio devices and instruments. Look for laptops that offer:
Multiple USB ports
Connectivity options to connect your audio interface, MIDI keyboards, and other peripherals
Ample ports, including at least two USB-C ports and an SD card reader, for connecting devices.
The MacBook Air M3 has limited port selection with only two USB-C/Thunderbolt 3 ports. While most laptops come with at least two USB ports, many users may require more, which can be supplemented with a USB hub. Ensuring your laptop can connect to all your necessary equipment without the need for excessive adapters is crucial for a streamlined setup.
Summary
Choosing the right laptop for music production involves balancing performance, portability, and budget. Whether you opt for the powerhouse Apple MacBook Pro M3 16”, the versatile Dell XPS 17, or a budget-friendly option like the ASUS Vivobook 16, each of these laptops can elevate your music production capabilities.
Remember to consider key features like processor power, RAM, and storage options, and don’t overlook additional factors like screen quality, battery life, and port availability. With the right laptop, your creativity can truly soar.
The Apple MacBook Pro M3 16″ is considered the best overall laptop for music production due to its powerful performance and stunning display. It is a top choice for professionals in the music industry.
You should consider the Apple MacBook Air M3 and Lenovo Yoga 7i 16 (2023) for a good mid-range laptop for music production. They offer a balance of performance and affordability.
The decision between a Mac and Windows laptop for music production depends on factors such as your budget, software preferences, and compatibility needs. Both platforms offer their own advantages.
TWO Legendary Subscriptions. ONE Unbeatable Price.
Get ALL of Slate Digital and Solid State Logic’s award-winning plugins in one convenient bundle. Unlock over 100 plugins worth over $12,000. Available now Month-to-Month, Annually Billed Monthly or Annually Billed Upfront.
Reverb is essential in mixing to create a sense of space and depth, and different types of reverb, such as hall, room, and plate, have unique characteristics tailored for specific elements in a track.
Properly balancing dry and wet signals and strategically using settings like decay time and pre-delay are critical for maintaining clarity, preventing muddiness, and achieving the desired depth and spatial perception in a mix.
Advanced reverb techniques, including the use of reverb sends, sidechain compression, and EQ and filters, can significantly enhance a professional mix by adding texture, maintaining clarity, and avoiding frequency buildup.
Achieving depth and character in your music relies heavily on one key element: reverb. But how do you use it effectively? In this guide, we’ll share essential tips for mixing reverb to help you craft a sound that’s professional and engaging. From understanding its role in depth perception to selecting the perfect reverb type for your track, each tip is geared towards elevating your mix.
Understanding Reverb and Its Role in Mixing
Reverb is created when sound waves bounce off surfaces in a space, weakening as they continue to travel until they eventually dissipate. This effect creates a sense of space and depth in the sound. This natural phenomenon, known as natural reverb, has been harnessed in music for centuries, long before digital technology made it accessible to everyone. Historically, concert halls and auditoriums were designed to enhance these reflections, creating a rich and immersive listening experience with the natural reverb effect.
In the context of mixing music, reverb is essential for creating a sense of space and depth. It allows individual elements to sit within a mix more naturally, making the overall sound more cohesive and pleasing to the ear. Different types of reverb, such as digital, convolution, and mechanical, offer unique characteristics that can be tailored to fit the needs of any track.
Whether you’re using a digital reverb plugin or a mechanical plate reverb, understanding how these effects work and their historical significance can help you make informed decisions in your mixing process. With the right reverb settings, you can transform a flat recording into a lively, dynamic piece of music that resonates with listeners.
Strategically Applying Reverb for Depth Perception
One of the most powerful uses of reverb in mixing is to create a sense of depth for the listener. By carefully adjusting reverb levels, you can manipulate how close or distant each sound source appears to the listener. This strategic use of reverb enhances the three-dimensional feel of your mix.
The Illusion of Distance
Reverb is a crucial tool in controlling the perceived distance of sound sources in a mix. By applying less reverb to a track, you can make the sound source feel closer to the listener, adding a sense of immediacy and intimacy. Conversely, increasing the reverb level can push the sound further back, adding an element of distance.
Using a low-pass filter on reverb can further enhance this illusion. By softening high frequencies, the reverb sound becomes more distant, helping to define the spatial depth of your mix. This technique can be particularly effective in creating a layered, immersive soundscape where each element has its own distinct place.
Balancing Dry and Wet Signals
Balancing dry and wet signals is crucial for maintaining clarity and depth in your mix. Too much reverb can muddy the sound, making it difficult to distinguish individual elements, while too little reverb can leave the mix sounding flat and lifeless. The mix knob on your reverb plugin allows you to blend these signals effectively, ensuring that the reverb complements rather than overwhelms the dry sound.
Using sends and returns can also provide greater control over the reverb levels. This setup allows you to:
Adjust the reverb signal independently of the dry signal
Fine-tune the balance and achieve a cohesive mix
Ensure that your mix retains its clarity while benefiting from the added depth of reverb
Properly balanced dry and wet signals are essential for a professional-sounding mix.
Choosing the Right Reverb Settings for Your Track
Selecting the right reverb settings is essential for complementing the elements of your track without causing muddiness. Parameters like decay time and pre-delay play critical roles in shaping the reverb sound to match the mood and genre of your music. For instance, a ‘blooming’ reverb effect that gradually increases can enhance the music without overwhelming it.
By considering the specific needs of your track and experimenting with different reverb settings, you can tailor the reverb to fit seamlessly within the mix. Whether you’re working on a fast-paced pop track or a slow, atmospheric piece, choosing the right settings will help you achieve the desired sonic character.
Tailoring Decay Time to Fit the Track
Tailoring the decay time to fit your track’s tempo is a key aspect of effective reverb mixing. Tempo-matching reverbs can enhance the groove and cohesion of the track by aligning the reverb’s rhythmic properties with the music. Setting the reverb time to a fraction or multiple of the track’s tempo, such as 1/4 or 1/2, can create a rhythmic reverb that blends seamlessly with the track.
For faster tracks with more elements, shorter decay times are often more effective as they prevent the mix from becoming cluttered. In contrast, slower, more sparse tracks can benefit from longer decay times, adding a sense of space and atmosphere. Automation can also be used to dynamically adjust decay times, providing sophisticated and responsive reverb application.
Pre-Delay for Precision
Pre-delay is another important parameter that can add precision to your reverb application. By delaying the onset of the reverb effect, you can prevent the initial sound from becoming blurred, maintaining clarity and definition. For vocals, pre-delay times between 20 to 80 milliseconds can help the dry vocal stand out before the reverb tail blooms.
Different instruments benefit from different pre-delay settings. Guitar tracks, for example, may benefit from longer pre-delay times, ranging from 40 to 100 milliseconds, to create a room-filling sensation. Drums, on the other hand, typically require shorter pre-delay times to preserve their punch and clarity. Adjusting pre-delay settings allows you to tailor the reverb effect to suit each element in your mix.
Harnessing the Power of Reverb Types
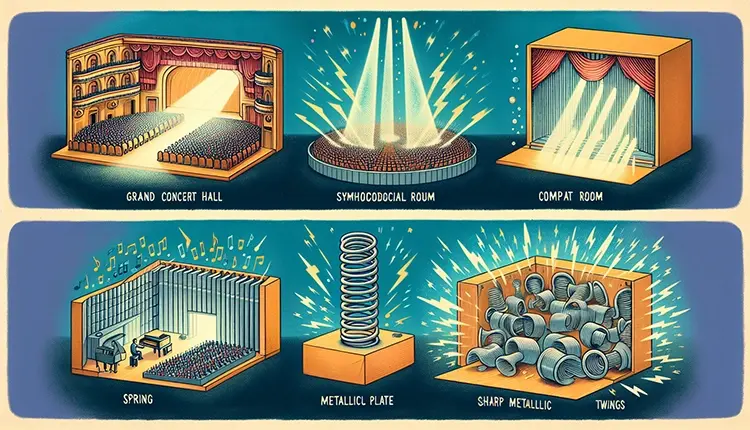
Different reverb types offer unique sonic characteristics that can be harnessed to create the desired character and space in your mix. Hall reverb, with its elongated decay times, is particularly well-suited for adding depth to orchestral arrangements. Room and plate reverbs, on the other hand, can be more effective on vocal tracks, providing intimacy and warmth.
Spring reverb, known for its bright and vintage sound, is a classic choice for guitar tracks, adding a distinctive vibe that stands out in the mix. Understanding the unique qualities of each reverb type allows you to choose the right one for your track, enhancing its sonic character and spatial depth.
Room vs. Hall: Creating the Right Acoustic Space
Room and hall reverbs create distinct acoustic spaces, each with its own unique characteristics. Room reverb is designed to emulate the acoustics of smaller spaces, maintaining intimacy and immediacy in the mix. This type of reverb is ideal for tracks where a close, personal sound is desired.
Hall reverb, by contrast, replicates the expansive sound of large spaces, providing depth and grandeur. This type of reverb is particularly complementary to strings and pads, adding a sense of vastness and majesty to the mix. Understanding when to use each type of reverb can help you create the right acoustic space for your music.
Plate Reverb for Vintage Warmth
Plate reverb offers a unique sonic signature that can add vintage warmth to your mix. Known for its instant high echo density and frequency-dependent decay times, plate reverb provides a dense, warm sound that is particularly effective on lead vocal tracks. Using longer decay for bass frequencies and shorter for treble tones adds a distinctive texture that can enhance the overall warmth of the mix, making it an excellent choice for adding vocal reverb.
However, plate reverbs can sometimes sound metallic, requiring subsequent EQ adjustments to achieve a more organic-sounding effect. By carefully tweaking the reverb settings, you can harness the vintage character of plate reverb to add depth and warmth to your music.
Advanced Reverb Techniques for a Professional Mix
For a truly professional mix, advanced reverb techniques (like using reverb sends and sidechain compression) can make a significant difference. A reverb send enables independent processing of the dry and wet signals, allowing for greater control and flexibility in the mix. This setup can help you fine-tune the reverb effect to fit seamlessly within the overall sound.
Sidechain compression is another powerful tool for maintaining clarity in a mix. By ducking the reverb effect in response to another sound, such as vocals or a kick drum, you can prevent it from overpowering other elements and keep the mix clean and defined. These advanced techniques can elevate your reverb mixing to a professional level.
Creative Use of Reverb Sends
Creative use of reverb sends can add unique textures and effects to your mix. For example, pitch-shifting effects, like octavized reverb on a send, can add presence to vocals and instruments. Distortion effects, such as bitcrushing or saturation, can also be applied to a reverb send to create a dramatically different character that can be further refined with EQ. Using a reverb send into your mix can help achieve these effects more efficiently, especially when using the same reverb settings across multiple tracks.
Automating reverb send parameters like the dry/wet mix or decay length can create dynamic changes that highlight important moments or transitions within a song. Employing rhythmic reverb splashes on specific beats enhances the groove and adds a dynamic reverb effect that integrates with the track’s rhythm. These techniques can help you create a more engaging and textured mix.
Dynamic Sidechain Compression for Clarity
Dynamic sidechain compression can be applied to reverb signals to maintain clarity and prevent them from overpowering other elements in the mix. By using sidechain techniques, you can manage the reverb effect so that it fills the spaces between phrases without interfering with the clarity of the instrumental sound.
By compressing the reverb tails, the quieter parts of the reverb become louder and more sustained, producing a pronounced reverb effect without muddiness. This technique ensures that the reverb enhances rather than detracts from the overall mix, providing a clean and professional sound.
Fine-Tuning Reverb with EQ and Filters
Fine-tuning reverb with EQ and filters is essential for maintaining clarity and avoiding muddiness in your mix. Equalizing reverb returns can prevent a buildup of murky frequencies, helping to keep the mix clean and well-defined. Balancing the wet and dry signals with EQ and compression can also avoid harshness and ensure that the reverb complements the overall sound.
Using techniques like the Abbey Road trick, which involves applying a high-pass filter at 600Hz before the reverb effect, can help manage low-end muddiness and retain a natural feeling. These fine-tuning techniques can make a significant difference in achieving a polished and professional mix.
Cutting Low Frequencies to Reduce Mud
Cutting low frequencies with a high-pass filter is a crucial step in reducing mud and maintaining clarity in your mix. Implementing a high-pass filter on the reverb return helps eliminate low-end rumble and prevents the mix from feeling weighed down. Cutting the low end around 100 Hz and below can greatly reduce unwanted low-frequency buildup, contributing to a cleaner mix.
Starting with a high-pass filter set at a low cutoff frequency, like 50 Hz, and gradually increasing it allows for fine-tuning the reverb effect to ensure a clean yet full reverb sound. This technique helps maintain the clarity and definition of your mix.
Sculpting High Frequencies for Natural Sound
Sculpting high frequencies with a low-pass filter can create a darker, warmer reverb sound that sits better in the mix without overwhelming the dry signal. Rolling off high frequencies in reverb can yield a sound that is less harsh and more natural, allowing the reverb to sit louder in the mix while maintaining clarity. This technique is particularly useful in preventing the reverb from clashing with the high-frequency content of the dry sound, ensuring that the direct sound remains prominent and clear.
By carefully adjusting the low-pass filter, you can achieve a balance where the reverb enhances the track without introducing unwanted high-frequency artifacts. This approach helps in creating a cohesive and polished final mix, where the reverb adds depth and warmth without overpowering the primary elements of the track.
Personalizing Reverb for Artistic Expression
Personalizing reverb for artistic expression involves experimenting with various reverb parameters and techniques to create unique sonic textures and enhance the distinctiveness of a mix. Genres such as jazz and folk often use natural-sounding reverbs to preserve the essence of live performance, creating an organic listening experience. In contrast, pop and electronic music frequently employ creative reverb techniques to maintain listener interest, such as selective reverb on drum hits or reverse reverb on progressions.
Implementing unconventional reverb settings can lead to original sonic textures that set your songs apart from the competition. Here are some techniques to try:
Bi-amplified reverb
Rhythmically splashed reverb
Bitcrushing applied to reverb
Saturation applied to reverb
By experimenting with these creative approaches, you can personalize your reverb use to reflect your artistic vision and enhance the overall impact of your music.
Experimentation Leads to Innovation
Experimenting with unconventional reverb settings and techniques can lead to innovative sound experiences and original sonic textures that reinforce the distinctiveness of a mix. Applying techniques like reverse reverb, where a sound is reversed, reverb is added, and then the sound is reversed back, can provide a haunting and unique texture. Similarly, freezing reverb tails to create sustained tones that can be resampled allows the creation of novel instruments composed solely of reverb reflections.
By pushing the boundaries of traditional reverb use, you can discover new ways to enhance your mixes and develop a signature sound. Encouraging experimentation not only leads to innovation but also helps you find unique solutions that can elevate your music and captivate your audience.
Enhance Your Mixes with Slate Digital’s Reverb Plugins
When it comes to mixing reverb, having the right tools at your disposal is crucial. Slate Digital offers a comprehensive range of reverb plugins designed to give you ultimate control over the space and depth of your mixes. Whether you need the natural acoustics of convolution reverb or the creative flexibility of algorithmic reverb, our plugins provide professional-grade results.
Our reverb plugins feature advanced settings such as pre-delay, modulation controls, and precise reverb tails that allow you to craft the perfect ambiance for your tracks. By integrating these plugins into your mixing workflow, you can add richness and dimension to vocals, drums, guitars, and more, ensuring each element sits perfectly in the mix.
Explore our collection of reverb plugins and discover how they can transform your mixing process. For more information and to find the perfect reverb plugin for your needs, visit our Reverb Plugins page.
Summary
In summary, properly mixing reverb requires a thorough understanding of its fundamental principles, strategically applying it for depth perception, choosing the right settings, harnessing different reverb types, employing advanced techniques, and fine-tuning with EQ and filters. Each of these steps contributes to creating a polished, professional sound that enhances the overall impact of your music.
Whether you’re aiming for a natural, live performance feel or a creatively processed sound, the tips and techniques outlined in this guide provide a solid foundation for effective reverb mixing. By experimenting and personalizing your approach, you can develop a unique sonic signature that sets your music apart. Embrace the power of reverb and transform your mixes into immersive, three-dimensional soundscapes.
By adjusting reverb levels and balancing dry and wet signals, you can create a sense of depth perception in your mix, simulating various distances for sound sources and enhancing the overall three-dimensional environment.
To prevent reverb from muddying your mix, use EQ and filters to cut low frequencies and sculpt high frequencies. This can help maintain clarity in your mix.
Experiment with techniques like reverse reverb, rhythmic reverb splashes, and applying distortion effects to reverb sends to create unique sonic textures in your mix. These can enhance the distinctiveness of your sound.
TWO Legendary Subscriptions. ONE Unbeatable Price.
Get ALL of Slate Digital and Solid State Logic’s award-winning plugins in one convenient bundle. Unlock over 100 plugins worth over $12,000. Available now Month-to-Month, Annually Billed Monthly or Annually Billed Upfront.
Understanding the essential stages of music production-songwriting, arranging, recording, mixing, and mastering-is crucial for producing quality tracks that resonate with audiences.
Investing in foundational music production equipment like a computer, DAW, audio interface, studio monitors, and microphones enhances the quality of your recordings and overall workflow.
Utilizing key production techniques such as layering sounds, using virtual instruments, and incorporating sampling and loops can greatly enrich your music, making it stand out in a competitive industry.
New to music production and unsure where to begin? This “music production for beginners” guide covers the essential steps and tools to start producing music today. Learn about the key stages of production, necessary equipment, and tips for setting up your home studio. Start your music production journey on confident footing.
Understanding Music Production
Music production, especially in the realm of modern music production, is the fascinating journey from a raw musical idea to a polished and ready-to-share track. It encompasses several stages, including:
Songwriting
Arranging
Recording
Mixing
Mastering
These stages are essential to produce music that resonates with audiences and stands out in the industry.
Each stage is a critical building block that contributes to the overall foundation of the final piece. A music producer is at the heart of this process, guiding the creative and technical aspects to bring an artist’s vision to life. From offering input during pre-production to managing budgets and providing a full creative vision, a music producer plays a pivotal role in the music production process.
Successful music producers often rely on their collaboration and communication skills. Working closely with recording engineers, mastering engineers, and other musicians, producers ensure that every element of the track aligns with the artist’s vision. Producers also need to demonstrate project management skills in order to meet deadlines and maintain the production process on track. These capabilities play a significant role in the successful completion of projects within the entertainment industry. Understanding music theory, having a solid grasp of digital audio workstations (DAWs), and mastering technical tools are also vital for achieving high-quality recordings and mixes.
Essential Music Production Equipment
You’ll need certain essential equipment to start your journey in music production. At the very least, you’ll need a computer, a Digital Audio Workstation (DAW), and a good pair of headphones. These tools are the foundation of your music production setup and will allow you to start producing music right away. As you advance, you might consider adding more specialized gear to enhance your workflow and improve the quality of your recordings.
Key pieces of equipment for setting up a home recording studio include:
An audio interface, which is crucial for connecting microphones and instruments to your computer
Studio monitors, which provide accurate sound reproduction for mixing and mastering
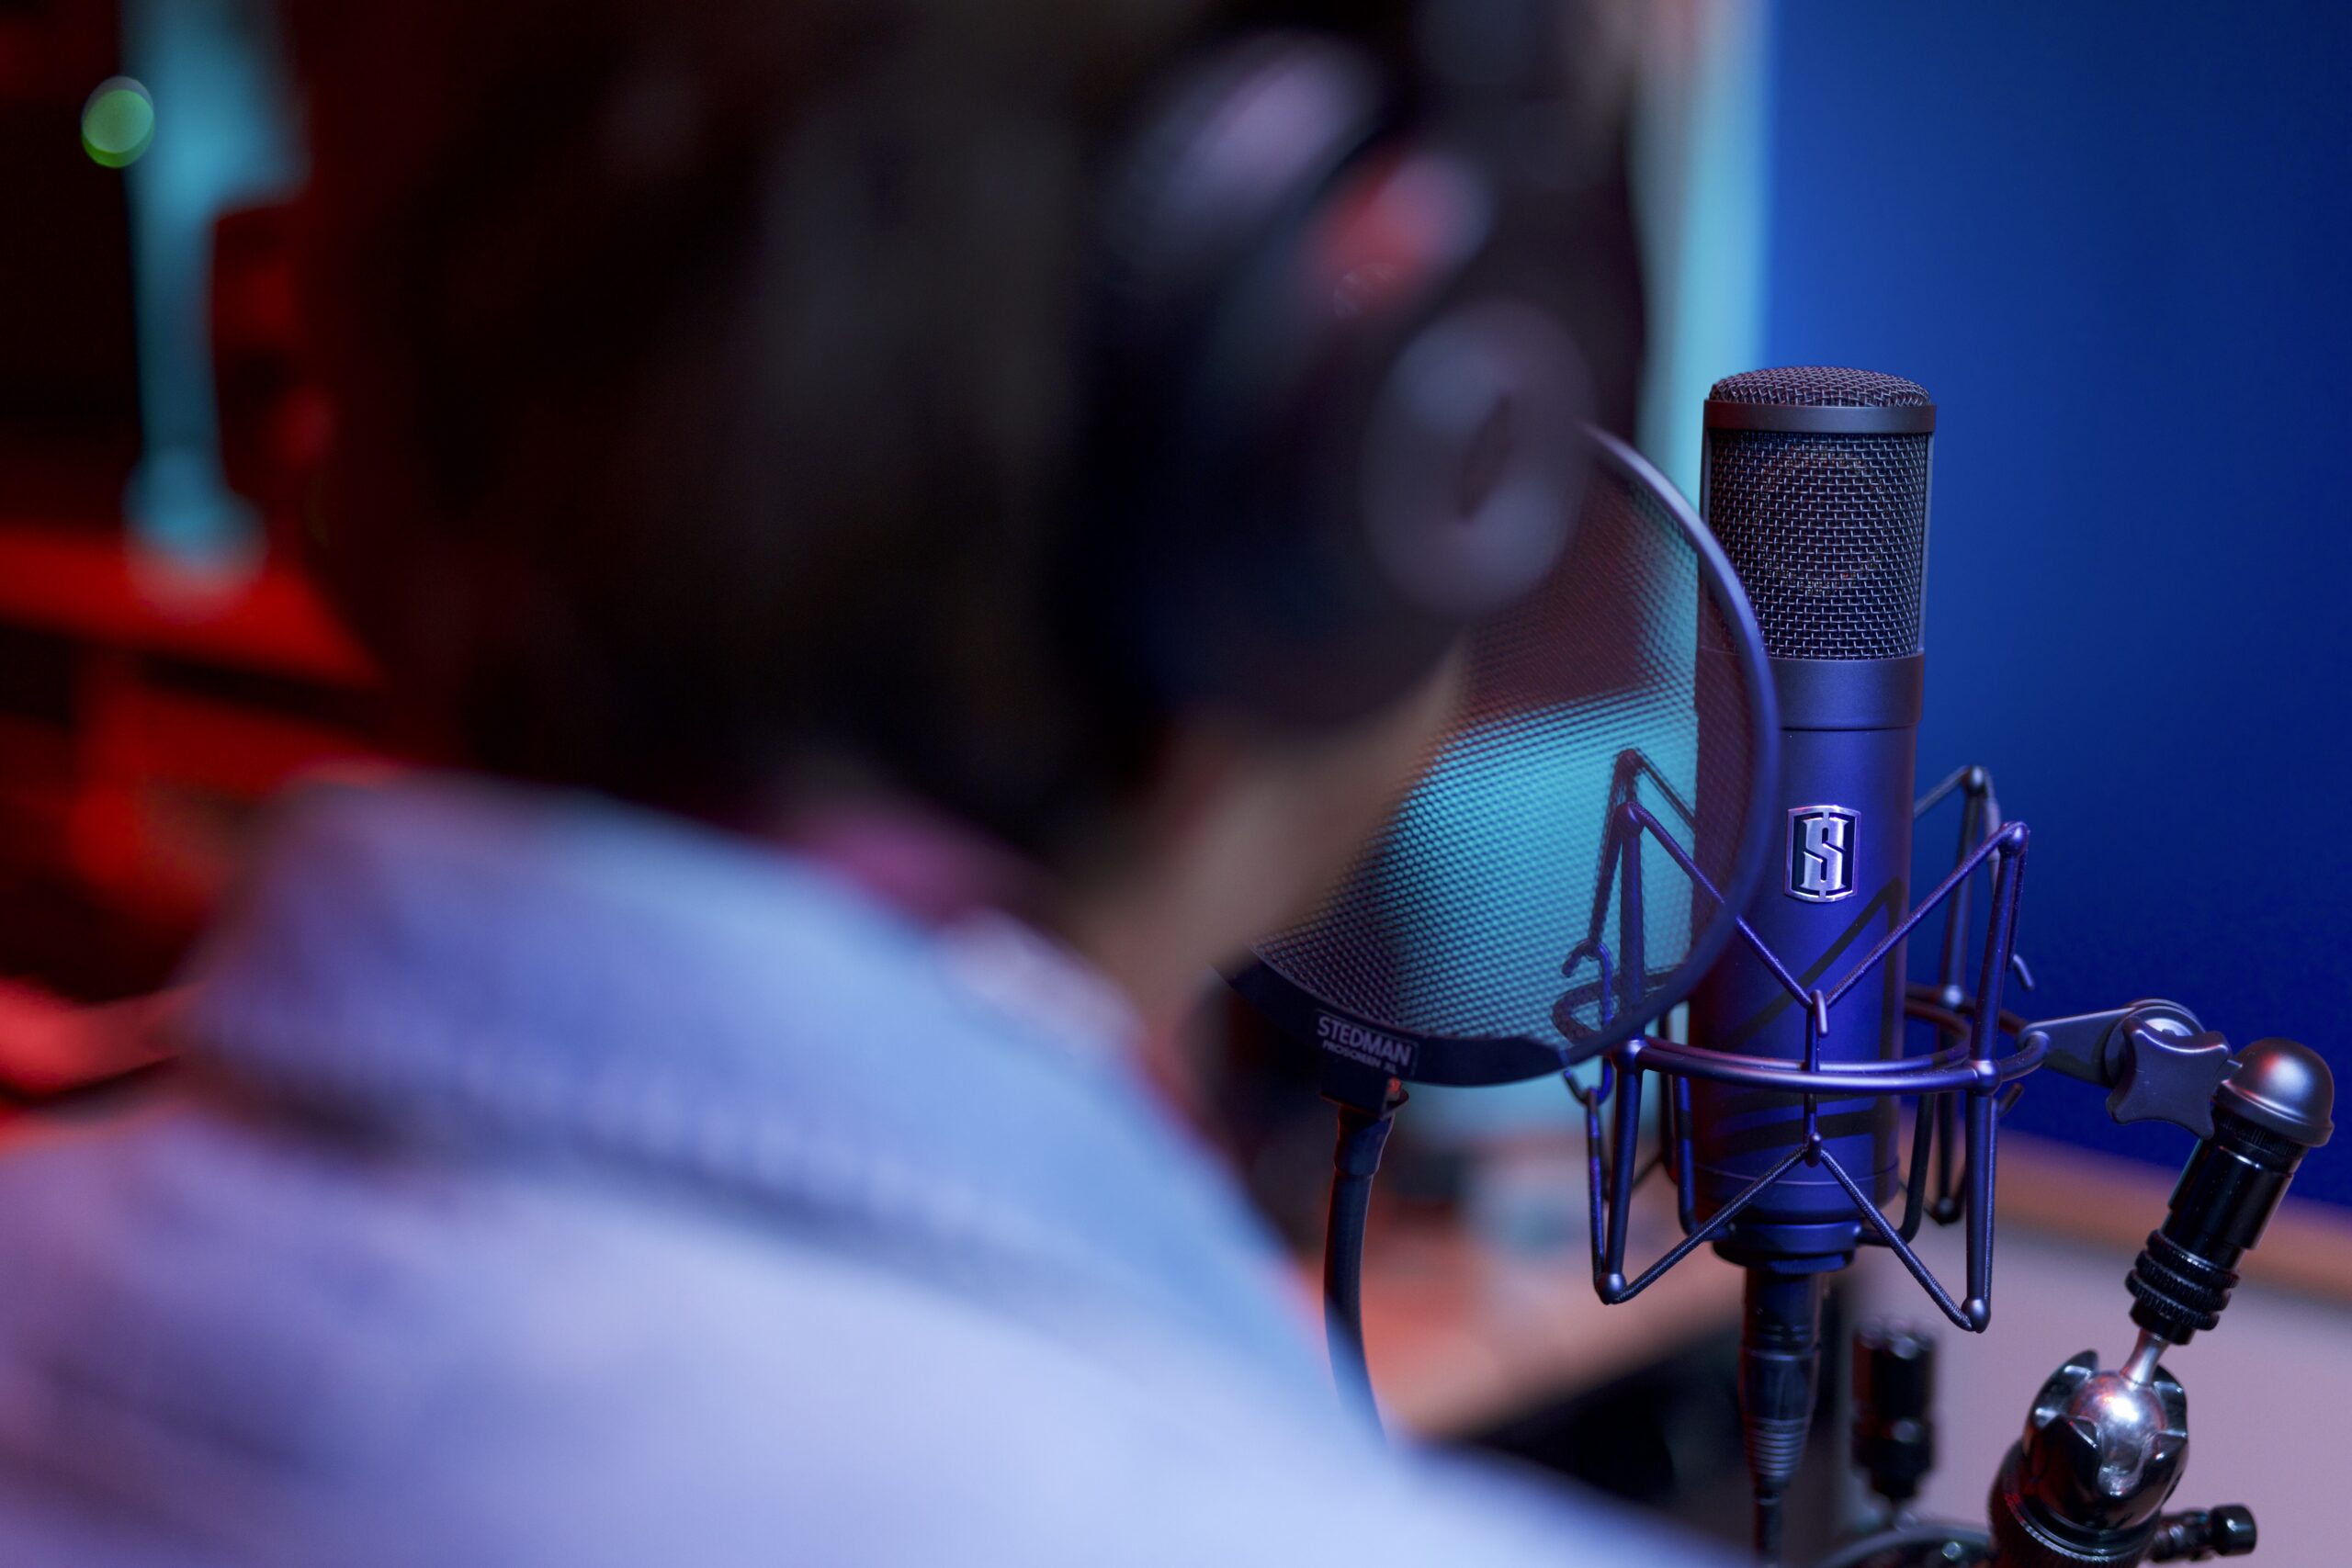
A dependable microphone, be it dynamic or condenser, for capturing high-quality vocals and instrument recordings
Gradually upgrading your gear as you improve will help you steadily achieve better sound quality and more professional results.
Computer Requirements
Your music production setup primarily revolves around your computer. It’s where you’ll develop your musical ideas, record tracks, and mix and master your music. While an average consumer system might suffice for basic production tasks, investing in a high-performance computer is recommended for more complex projects.
Here are some key specifications to look for in a music production computer:
At least 8GB of RAM (ideally 16GB)
A 4-core processor
An SSD for your primary drive
An HDD for secondary storage
These specifications will ensure smooth operation and provide a good balance between performance and cost.
When working with a DAW, the buffer size can impact your computer’s performance. A larger buffer size allows the DAW to handle audio more smoothly, while a smaller buffer size makes the computer work harder, which can be challenging during intensive recording sessions. Selecting the right computer specifications will help you avoid technical issues and focus on the creative aspects of music production.
Choosing Your Digital Audio Workstation (DAW)
A Digital Audio Workstation (DAW) serves as your creative playground where you create, record, edit, mix, and master your music. The selection of an appropriate DAW is vital as it influences your workflow and determines your overall productivity. Popular DAWs include:
Each offers their own unique features and capabilities. Some DAWs, like GarageBand and BandLab, are free and provide a great starting point for beginners.
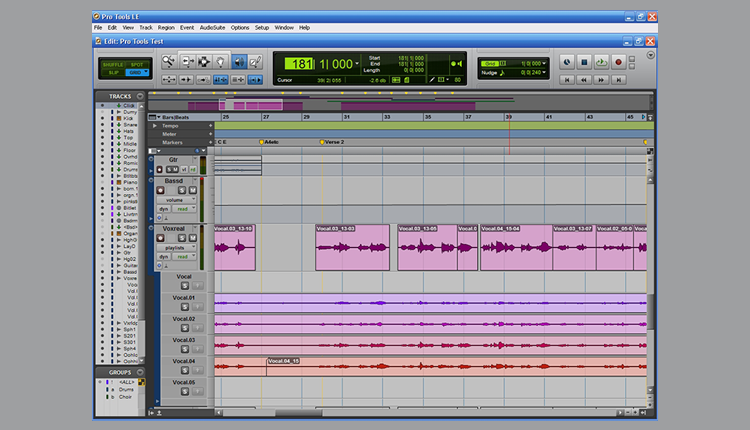
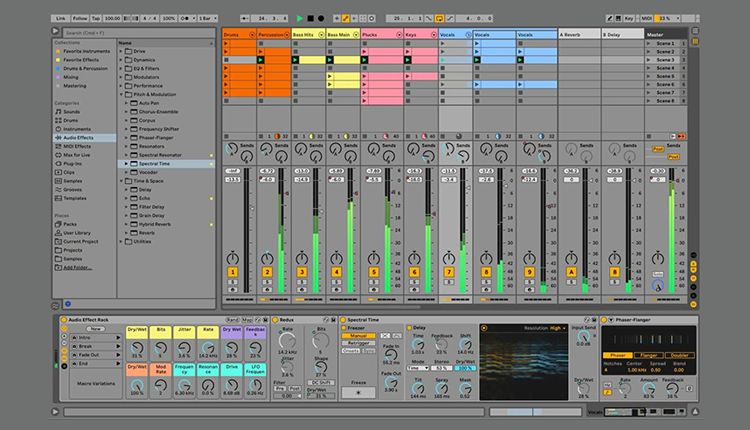
When selecting a DAW, consider factors such as compatibility with your computer’s operating system, ease of use, and your budget. It’s also important to think about the style of music you want to produce, as some DAWs are better suited for certain genres. For example, Ableton Live is popular among electronic music and hip-hop producers, while Pro Tools is widely used in professional recording studios. Testing multiple DAWs before committing to one can help you find the best fit for your needs.
Soundtrap is an example of a web-based music studio platform that offers an all-in-one solution for music production. It includes pre-made loops and sounds, making it easy to start producing music without needing extensive prior knowledge. Whether you choose a free or paid DAW, finding one that suits your workflow and style is key to a successful music production journey.
Audio Interface Basics
An audio interface forms an integral part of your music production setup. It performs the following functions:
Converts analog sound to digital, allowing you to record music and instruments through microphones or line inputs.
Helps mitigate latency issues by providing dedicated audio drivers for professional-level audio work.
Ensures that your recordings are clear and free from delays.
The number of inputs and outputs you require should be a key consideration when selecting an audio interface. For beginners, a simple setup with one microphone and one instrument input might be sufficient. However, if you plan to record multiple instruments or a full band, you may need an interface with more inputs.
The Focusrite Scarlett 2i2 is a popular choice for beginners due to its reliability and ease of use.
Studio Monitors and Headphones
Producing high-quality music necessitates accurate sound monitoring. For this purpose, studio monitors and headphones are indispensable tools. Studio monitors provide an authentic representation of your track with a flat frequency response, ensuring that your music translates well across different playback systems. For most home studios, monitors with 5 or 6-inch drivers are sufficient.
Headphones, on the other hand, allow you to isolate details and identify subtle nuances in your tracks. Flat headphones are essential for accurate sound monitoring during production and mixing. The Beyerdynamic DT 770 Pro is a great option for beginners due to its high-quality sound and comfortable design.
Investing in good studio monitors and headphones will help you make better mixing decisions and achieve professional-sounding results.
Microphone Options
To capture high-quality recordings, selecting the right microphone is of paramount importance. Dynamic and condenser microphones are the two most popular types of microphones. Each type has unique characteristics and is suitable for different recording scenarios:
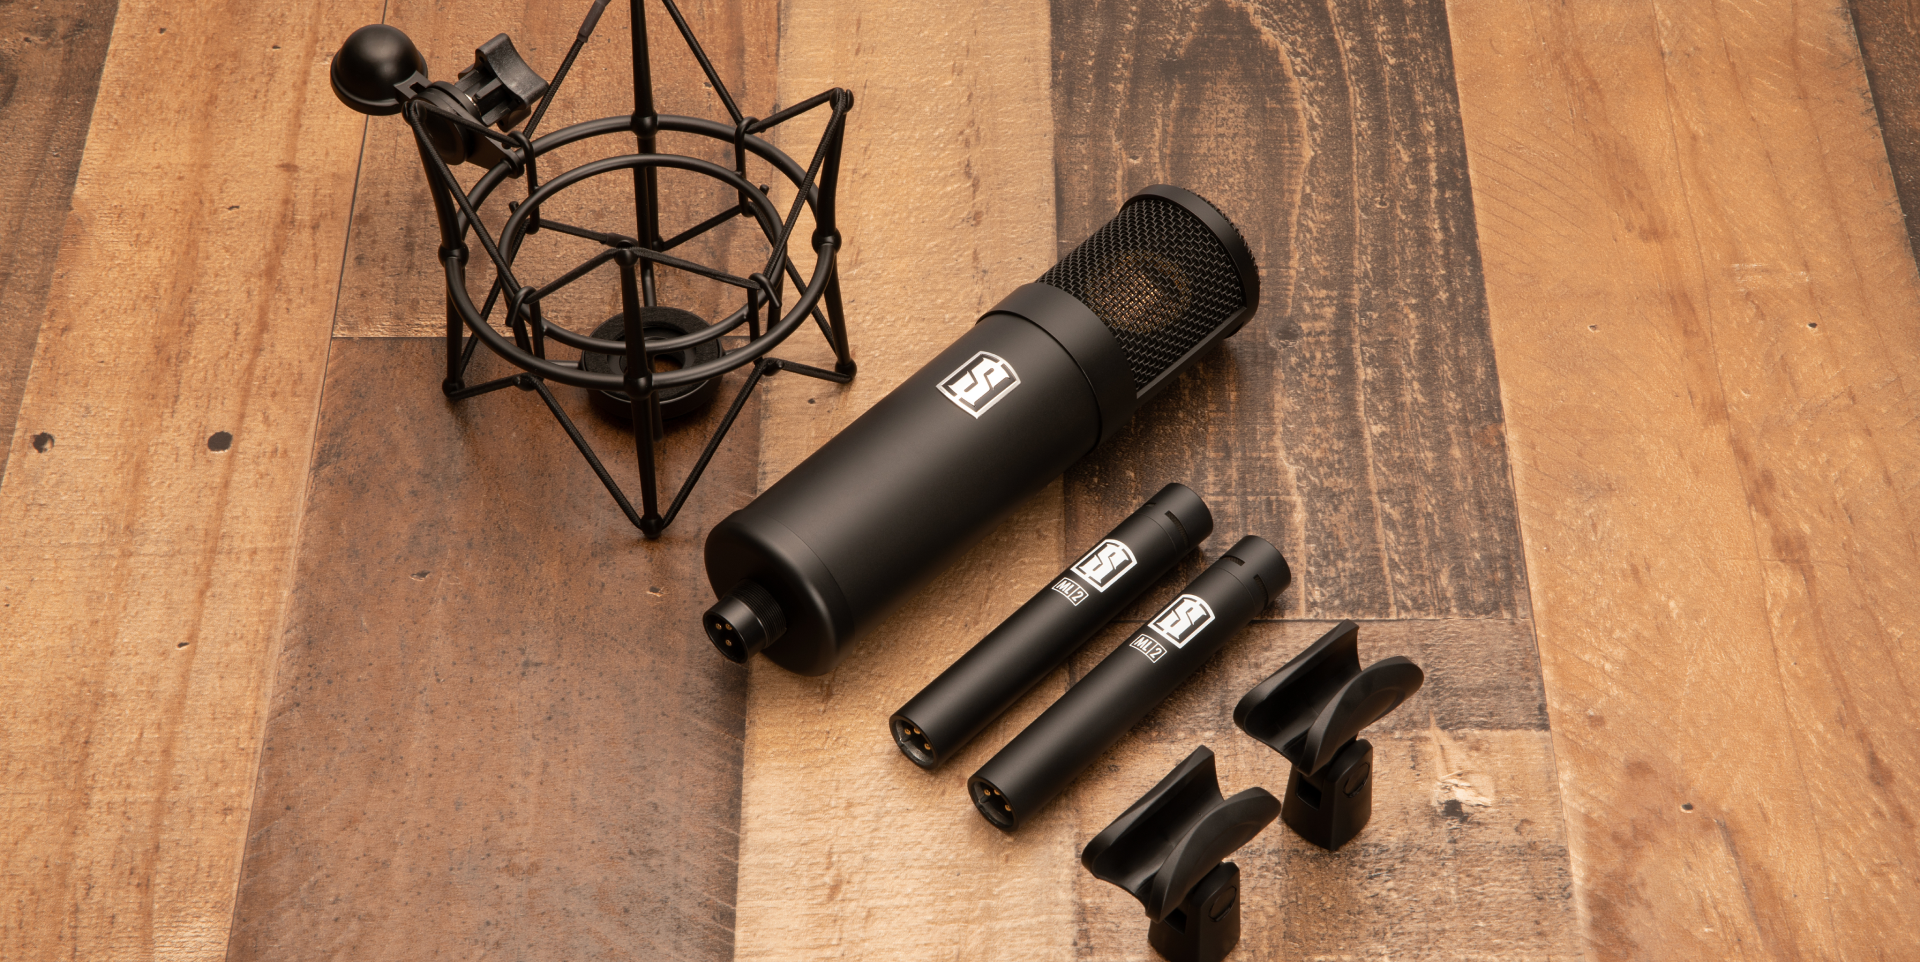
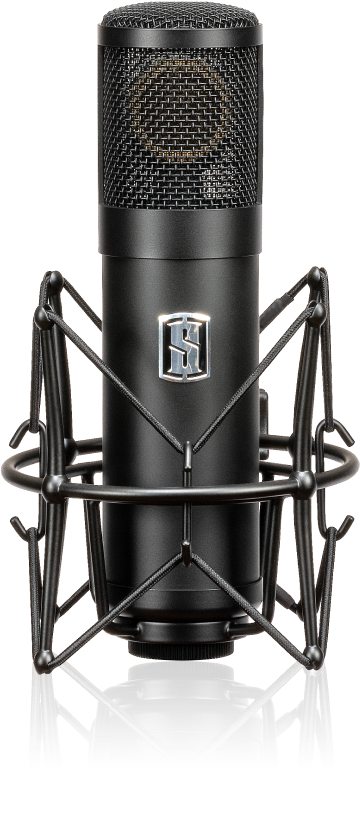
Condenser microphones, like the Slate Digital ML-1, are more sensitive and are commonly used for recording vocals and acoustic instruments. They require phantom power, which is usually provided by the audio interface. Beginners should aim to find a balance between quality and price, as it’s possible to get great recordings with reasonably priced microphones.
Dynamic microphones, such as the Slate Digital ML-2, are great for recording loud sound sources like electric guitars and drums. They are durable and can handle high sound pressure levels without distortion.
Having both a dynamic and a condenser microphone in your arsenal will give you the versatility to record a wide range of instruments and vocals.
Setting Up Your Home Studio
Creating an effective home studio is the first step towards producing professional-quality music. The size of your studio should reflect how you plan to use it; larger spaces are needed for tracking drums or a full band, while smaller rooms can work for solo projects. When selecting a room, avoid low ceilings and square shapes, as they can cause sound issues such as reflections and frequency cancellations.
Clear playback and better mixing decisions demand proper acoustic treatment. Use materials like foam panels to minimize sound reflections and improve sound quality. Investing in basic room treatment will make a significant difference in how your music sounds. Additionally, ensure that your equipment is set up ergonomically to create a comfortable and efficient workspace.
The Music Production Process
The music production process is a multi-faceted journey that involves several stages:
Songwriting is where creativity takes center stage, allowing you to craft melodies, harmonies, and rhythms that resonate with listeners.
Arranging involves organizing the song parts and selecting instruments to create a cohesive structure.
Tracking is the process of recording each instrument and vocal performance, often one track at a time.
Editing refines these recordings, adjusting pitches and timings to ensure a seamless mix.
Mixing combines all the recorded elements, balancing sound levels, and adding effects to create a polished track.
Mastering adds the finishing touches, preparing your music for distribution and ensuring it sounds great on all playback systems.
Each step plays a critical role in shaping the final sound of your music.
Songwriting and Composition
Songwriting is where ideas become art. The process usually involves:
Brainstorming musical ideas
Experimenting with different melodies, harmonies, and rhythms
Creativity and experimentation
Considering the emotional impact you want to convey
How each element contributes to the overall feel of the song
A good song should have:
A melody and harmony that are catchy enough to stay in the listener’s head
A rhythm that makes the listener tap their foot
A chord progression that dictates the mood and tone of the song
An arrangement that organizes song parts and selects instruments to create a cohesive structure
Don’t be afraid to jam around and experiment with different key signatures until you find what works best.
Most popular songs follow a standard structure which typically includes:
Intro
Verse
Hook
Bridge
Outro
This structure helps create an engaging and memorable song for listeners. While the content of the full song is important, you will benefit from putting some extra effort into your hook and bridge.
The hook is considered the most important part of a song, as it’s the section that listeners remember the most. The bridge brings variety and helps maintain the listener’s interest by introducing a different harmonic structure and lyrics. By following these principles, you can create songs that captivate and resonate with your audience.
Recording Techniques
When producing professional-quality recordings, capturing high-quality takes is a essential. One of the first steps is finding the quietest space possible to minimize background noise, which can easily ruin a good take. Proper microphone setup is also crucial. Placing the microphone correctly and using pop filters can help reduce unwanted noise and ensure clean recordings.
During the recording phase, it’s important to focus on:
Capturing a superior live performance, even if you have access to editing tools
Recording multiple takes to capture unique variations that add character to the track
Remembering that the goal is to get the best possible performance from the artist, which will make the mixing and editing processes much smoother.
Editing Your Tracks
Editing is a critical phase in music production, where captured tracks are refined and prepared for mixing. This stage involves:
Adjusting pitches
Timing
Ensuring smooth transitions between different parts of the track
Eliminating any inconsistencies or noise that might have been captured during recording
The purpose of audio editing is to:
Polish the raw recordings
Make them sound cohesive
Refine each track to set the foundation for a seamless and professional mix
Enhance the overall quality of your music, making it more enjoyable for listeners.
Mixing Fundamentals
Mixing is the process of combining all the recorded elements into a stereo 2-track mix, ensuring clarity and balance among all components. The key elements of mixing include:
Balancing sound levels
Equalization (EQ)
Compression
Reverb
Balancing levels is crucial to ensure each instrument and vocal can be heard clearly without overpowering each other.
Using EQ helps shape the sound by:
reducing and highlighting specific frequencies
adding brightness to vocals with a high slope around 10kHz
removing unnecessary low frequencies from female vocals with a low cut below 100Hz
Compression controls the dynamics of the audio, ensuring a balanced and polished sound. Carefully adjusting the attack and release times in compression will help you achieve the desired effect in your mix.
Reverb adds space and depth to your mix, making it sound more natural and cohesive. Different reverb types and settings can be used to suit various elements of your mix. By mastering these fundamental techniques, you can create a mix where every component shines yet works cohesively as part of the bigger picture.
Mastering Your Music
Mastering is the final step in the music production process, aimed at adding the finishing touches and making the track sound as good as possible. This stage ensures your music is polished and ready for distribution, with the goal of bringing the track to the next level in clarity and brilliance. Mastering helps make a collection of songs sound coherent and sonically consistent as part of the same album.
For beginners, using an automated mastering service like VIRTU Assisted Mastering can be a good starting point to understand the process and benchmark your ears. Alternatively, hiring a mastering engineer can provide professional results and ensure your music translates well across different playback systems. Mastering is essential for achieving a final product that stands out in the competitive music industry.
Key Production Techniques
Elevating your music to new heights can be achieved by mastering key production techniques. Techniques such as:
Sampling
Layering
Synthesis
Arrangement
are vital tools in a modern music producer’s arsenal. These techniques allow you to add depth, complexity, and unique elements to your tracks, making them stand out in a crowded market.
Quantization can adjust the timing of recorded notes or beats, fixing sloppy performances or creatively altering the rhythmic feel. However, overusing quantization can make the music sound robotic and soulless, so it’s important to use it judiciously.
Reverb is another essential tool that adds space and depth to recordings. It is often used on:
Vocals
Guitars
Snare drums
Strings
By mastering these techniques, you can enhance the quality and creativity of your music production.
Layering Sounds
Layering sounds involves combining multiple audio tracks to create a fuller, more interesting auditory experience for the listener. Effective sound can add depth and richness to your music, and requires careful selection and blending of different sonic elements to ensure they complement each other.
Layering can also help fill out the frequency spectrum, making your music sound more balanced and dynamic. Whether you’re adding subtle background elements or bold lead sounds, layering is a powerful tool for enhancing your music production.
Using Virtual Instruments
Virtual instruments offer a vast array of sounds without the need for physical hardware. These instruments can be integrated into your DAW, allowing you to access a wide range of sounds and effects at your fingertips. Virtual instruments can streamline the creative process, enabling you to:
Experiment with different sounds and ideas quickly
Easily switch between different instrument sounds
Customize and tweak sounds to fit your production
Access a wide variety of instruments and effects without the need for physical space or expensive equipment
By utilizing virtual instruments and music production software, you can enhance your music production and create unique and professional-sounding own music tracks with actual music.
Using virtual instruments can expand your sonic palette and allow you to incorporate diverse elements into your music. From realistic acoustic instruments to cutting-edge electronic sounds, virtual instruments provide endless possibilities for creativity. Incorporating these tools into your production workflow can help you achieve professional-sounding results without breaking the bank.
Sampling and Loops
Sampling involves taking a portion of a sound recording and reusing it in a different musical context, often leading to innovative and unique tracks. This technique has been used by many successful producers to create new music from existing recordings. Loops, on the other hand, are short sections of music that can be repeated seamlessly, providing a rhythmic or melodic foundation for a track.
Sampling and loops can add a distinctive character to your music and inspire new ideas. Notable producers like DJ Shadow, The Avalanches, DJ Premier, and Kanye West have built careers on creatively manipulating samples. By incorporating sampling and loops into your production workflow, you can create tracks that are both innovative and engaging.
Learning Resources and Communities
A plethora of online platforms are available for learning music production and honing your skills. Udemy offers a comprehensive course on Logic Pro X, which is suitable for Mac users and includes 40 hours of on-demand video. Coursera provides a Music Production Specialization by Berklee College of Music, covering topics such as music production technology and Pro Tools basics.
Practical Tips for Beginners
For beginner music producers, practical advice can have a significant impact. Applying the ‘less is more’ principle can help you avoid overcomplicating your tracks and maintain clarity and focus. Watching tutorials and seeking mentoring from experienced producers can provide practical insights and accelerate your learning process.
Here are some tips for success in music production:
Listen to a wide range of music genres to fuel your creativity and prevent your productions from becoming repetitive.
Collaborate with other producers to enhance your skills and have fulfilling and fun experiences.
Remember that persistence and hard work are key to long-term success in music production, often outweighing natural talent.
Summary
Mastering the art of music production involves understanding the entire process, from songwriting to mastering, and having the right equipment and techniques at your disposal. By setting up a well-equipped home studio and continuously learning and experimenting, you can create professional-quality music that resonates with listeners. Remember, collaboration and communication are essential for bringing an artist’s vision to life.
As you embark on your music production journey, stay motivated and keep honing your skills. The world of music production is vast and full of opportunities. With persistence and creativity, you can achieve your musical goals and share your unique sound with the world. So, start producing and let your music speak!
The role of a music producer is to oversee the entire music production process, guiding the creative and technical aspects to bring the artist’s vision to life. This includes overseeing everything from songwriting to mastering.
For beginner music producers, the essential pieces of equipment include a computer, Digital Audio Workstation (DAW), audio interface, studio monitors, headphones, and a microphone. These tools form the foundation of a music production setup.
Acoustic treatment is crucial for a home studio as it minimizes sound reflections and improves sound quality, leading to better mixing decisions and clear playback. It can make a significant difference in how your music sounds.
There are several popular DAWs for music production, such as Ableton Live, Pro Tools, Logic Pro, FL Studio, and GarageBand. It’s essential to select the one that best fits your workflow.
To improve your music production skills as a beginner, watch tutorials, seek mentoring, engage with online communities, experiment with different techniques, and collaborate with other producers. Listening to a wide range of music can also enhance your skills and creativity.
TWO Legendary Subscriptions. ONE Unbeatable Price.
Get ALL of Slate Digital and Solid State Logic’s award-winning plugins in one convenient bundle. Unlock over 100 plugins worth over $12,000. Available now Month-to-Month, Annually Billed Monthly or Annually Billed Upfront.
Music production is a holistic process involving songwriting, arranging, recording, and technical skills, with the producer playing a key role in transforming musical ideas into polished tracks.
Aspiring music producers need essential gear like a Digital Audio Workstation (DAW), audio interface, studio monitors, and MIDI controllers to build a functional home studio and craft their music.
Releasing music today involves digital distribution, mastering tracks for uniform quality, and employing marketing and branding strategies to share the music with a global audience.
Ready to bring your musical dreams to life, but don’t know where to start? We’ve got you covered. From choosing the right equipment and software to mastering your final track, this quick and helpful guide will walk you through the essential processes and gear to make your musical dreams come true. Expect tips for beginners and insights into the role of a music producer, all designed to help you start your music production journey with confidence.
Demystifying Music ProductionDelve into the heart of music production, where a single musical idea blossoms into a full-fledged song. It’s a journey through:
Songwriting
Composition
Sound design
Mixing
Mastering
The music production process is more than just piecing together notes and rhythms; it’s about understanding technical nuances and how a song can evolve with sub-ideas to strike a chord with listeners. The music producer is the architect of this creative and technical endeavor, weaving together concepts and sounds to sculpt the final musical piece.
The Role of a Music ProducerStep into the shoes of a successful music producer, a role that is as dynamic as it is crucial. The music producer is responsible for:
Bridging creative ideas with practical execution
Providing leadership and guidance to artists
Having a deep understanding of music and musical knowledge
Being proficient in recording and engineering
Managing the intricate details of contracts and project budgets
They are the maestros of the studio, ensuring that the vision for a project is brought to life.
With a hand in arranging compositions, supervising recording sessions, and proposing alterations to the music, they are pivotal in transforming a rough sketch into a masterpiece. Sometimes, they even step into the realm of songwriting, crafting melodies and lyrics that resonate with the soul.
Essential Gear for Modern Music ProductionEmbarking on the music production journey requires more than just passion. It demands a toolkit that can transform your creative visions into auditory reality. Key to this process is a modern music production setup that includes:
A Digital Audio Workstation (DAW)
An audio interface
Studio monitors
Headphones
MIDI controllers
This gear is the bedrock upon which you will build your sound empire, from the first note to the final master.
Choosing Your Digital Audio Workstation (DAW)
The heartbeat of your home studio is your DAW. This music production software is your canvas for composing, recording, and mixing tracks. There’s a galaxy of DAWs out there, from FL Studio’s beat-centric platform to Logic Pro’s comprehensive suite for recording and production.
As a newcomer, dipping your toes into the waters of different DAWs via free trials can help you find the one that resonates with your workflow and musical style.
Building Your Home Studio Setup
Your home studio is where magic happens. It’s where you capture your musical ideas and polish them into finished tracks. A basic setup includes:
A reliable computer
DAW
MIDI controller
Audio interface
A trusty microphone (like the Slate Digital ML-1)
Make sure you don’t overlook the acoustics of your recording space, either—acoustic paneling can quickly transform an echoey room into a pristine audio environment.
Selecting Virtual Instruments & Plugins
In the digital age, virtual instruments and plugins are your sonic paintbrushes, allowing you to splash your music with textures and rhythms that were once unimaginable. For those who love to experiment with beats and live performance, a grid controller like the Novation Launchpad can be a game-changer. A wavetable synthesizer like ANA 2, with its user-friendly interface and vast library, can be a cornerstone for your sound design, offering a plethora of presets to inspire your next hit.
Remember, sound hunting is not just a hobby; it’s an essential part of music production that gives you the building blocks for new musical ideas. And when it comes to shaping these sounds, tools like samplers are invaluable for crafting unique audio textures that set your tracks apart.
Crafting Your First Track: A Step-by-Step Guide
Now that you’re equipped with the tools of the trade, it’s time to embark on crafting your very first track. The process includes pre-production composition and song arrangement, followed by the recording and editing phase, and culminates in mixing and mastering.
A tentative song structure can act as a blueprint, guiding your creativity and simplifying the recording process. As you navigate through these stages, remember that each step is a learning experience, paving the way for your growth as a music producer.
Songwriting Essentials
Songwriting is the soul of your track; it’s where you breathe life into melodies and harmonies. By understanding music theory, you can craft melodies that linger in the mind, using scales and strong note choices to create tunes that resonate with listeners. Some tips for creating melodies that feel both fresh and familiar:
Use the pentatonic scale, with its universal appeal, as a great starting point.
Experiment with different note choices and intervals to create unique melodies.
Pay attention to the rhythm and phrasing of your melodies to make them memorable.
Don’t be afraid to break the rules and try something unexpected.
By following these tips, you can create melodies that captivate your audience and make your songs stand out when you record music.
Structure your melodies with clear beginnings, climaxes, and ends, and use stepwise motion to keep them simple yet memorable. And let’s not forget the backbone of your song: chord progressions. They set the emotional tone and are essential for supporting your melodies throughout the track.
Recording Techniques
When it’s time to finallly capture your compositions, the right recording techniques are paramount. An audio interface is your gateway to digital clarity, translating the nuances of your performance into a language your computer understands. Whether you’re recording vocals or an electric guitar, the intimacy and authenticity of your own recordings bring a unique character to your music.
While you might feel daunted by the technicalities, rest assured that with a bit of guidance, you can overcome any obstacles presented by recording space and microphone setup. Throughout this phase, rely on studio headphones for their flat frequency response, ensuring you’re hearing the truth of your music.
Mixing Mastery
Mixing is where you refine your track into a cohesive whole, balancing levels and textures to achieve a polished sound. Begin by pulling your faders down to create headroom for the mixing process, about -6db. Over time, your ears will learn to naturally discern the subtleties of balance and texture, which are crucial to achieving a polished, well-balanced mix.
Employ equalizers, compressors, and reverbs to shape your sound—these are the sculpting tools of a music producer. Don’t hesitate to use signal analyzers for precise equalization, ensuring that each element of your track harmonizes with the mix. Remember, a good understanding of mixing is what separates a rough mix from a professional one.
From Mixing to Mastering
Mastering, performed by a mastering engineer, is the final polish on your musical gem, ensuring that it shines with clarity and brilliance across all playback systems. This stage is about:
Elevating your track’s quality
Optimizing its loudness
Ensuring it adheres to industry standards
Getting it ready for the ears of the world.
It’s a meticulous process that not only enhances the audio but also checks for any inconsistencies, ensuring that your single or album maintains a consistent high-quality sound.
Releasing Music in the Digital Age
Welcome to the digital age, where your music can travel from your home studio to the farthest corners of the globe with the click of a button. To release your music, you’ll need to navigate the digital landscape with the help of music distributors who ensure your tracks are formatted correctly and loaded with the proper metadata for platforms like Spotify and Apple Music. These distributors offer a range of services tailored to different artist needs, including promotional tools and strategic advice, making them invaluable allies for independent artists looking to make their mark.
Utilize tools like SmartLink to give fans a one-stop link to your music, and platforms like Spotify for Artists to analyze and promote your work.
Continuing Your Production Journey
The music production journey doesn’t end with the release of your track—it’s a continuous path of growth and learning. Stay current with the latest trends and innovations by experimenting with new genres and tools. Embrace versatility and adaptability, expanding your opportunities in the music industry.
To stay up-to-date and relevant in the music industry, here are some key actions to take:
Seek out online courses, workshops, and read industry publications to keep your knowledge fresh.
Networking is essential; attend events, engage in online communities, and follow influencers to connect with industry professionals.
Be open to embracing new technologies and platforms as they emerge.
Transforming Your Passion into a Career
Transforming your passion for music production into a career is a journey of strategic moves and personal branding. Networking is the lifeline of the industry, and with the right connections, you can open doors that lead to collaboration and opportunity. Reach out to labels, publishers, and build a social media presence that showcases your unique style and skills. A strong brand identity and savvy marketing strategies, including email campaigns and social media, are essential for standing out in a crowded marketplace.
By consistently producing music and sharing your own music, you demonstrate your creative vision and carve out a niche for yourself in the music world, as you create music that resonates with your audience.
Summary
To wrap up, producing music is an odyssey filled with creativity, technical mastery, and personal growth. From crafting your first track to mastering and releasing it into the digital world, each step is a building block towards realizing your musical dreams. With the right tools, techniques, and tenacity, you can transform your passion for music into a resonant career that not only fulfills you artistically but also resonates with listeners across the globe. The stage is set, the studio awaits—it’s time to make your mark on the music industry.
Find a DAW that offers an easy-to-understand interface and a smooth learning curve, along with extensive features to foster creative experimentation without causing you to feel swamped. Confirm that it is within your financial means and supports your operating system.
Certainly, it’s possible to integrate plugins from various providers into your DAW, provided that they adhere to a compatible plugin format such as VST or AU. Verifying their compatibility with your particular DAW is crucial.
Certainly, acquiring an audio interface is advisable if you’re aiming for enhanced sound quality and greater versatility during recording sessions with your DAW.
For those committed to music production, it’s a valuable component to add to your setup.
Beginning with free DAWs offers learners the opportunity to develop their skills without any financial stress. As one’s abilities evolve, it may prove advantageous to invest in a paid version that comes equipped with sophisticated functionalities.
TWO Legendary Subscriptions. ONE Unbeatable Price.
Get ALL of Slate Digital and Solid State Logic’s award-winning plugins in one convenient bundle. Unlock over 100 plugins worth over $12,000. Available now Month-to-Month, Annually Billed Monthly or Annually Billed Upfront.
You can create a quality home recording studio on a budget by choosing the right space, using DIY acoustic treatments, and prioritizing essential gear like a good computer, DAW, and microphones.
Invest in key equipment like a reliable computer and DAW, a quality microphone for your needs, an audio interface, and either headphones or studio monitors for mixing and mastering.
Keep costs manageable by starting with free or trial version software and plugins, focusing on optimizing your workflow, and strategically purchasing additional equipment as your budget allows.
Want to set up a home recording studio on a budget? In this article, we’ll show you how it’s not about how much you spend, but about making smart choices with what you have. You’ll get practical tips on selecting and optimizing space, picking essential equipment, and finding the right tech—all while keeping a tight rein on costs when setting up a home recording studio on a budget. Prepare to transform your home into a space where quality recordings don’t break the bank.
Choosing the Right Space for Your Home Studio
The journey to recording mastery begins with finding the perfect recording space. Think of it as setting the stage for your musical escapades. Whether you’re belting out power-packed vocals or capturing the intricate strums of an acoustic guitar, the space you choose can make or break your sound. It’s about striking a balance between convenience, acoustics, and isolation—transforming an ordinary room into a sonic sanctuary.
So, how do you pinpoint that sweet spot in your home where every beat resonates just right? Join us as we unveil the secrets.
Identifying the Best Room
Choosing the right room is like picking the perfect instrument—it sets the tone for everything else. You want a space that’s just right, not a cramped box room that chokes your creativity. Acoustic treatment may seem daunting, but even in tight quarters, it’s your ally for ensuring stellar sound.
And remember, your monitoring setup needs to fit like a glove; after all, you’re sculpting sounds that might one day fill arenas. Size does matter, but it’s what you do with it that counts.
DIY Acoustic Treatment
Now, don’t let the phrase ‘acoustic treatment’ send shivers down your spine. It’s not about breaking the bank; it’s about breaking the notion that good sound costs a fortune. With some ingenuity, everyday items like blankets and foam can be your best friends in the quest for crisp, clear sound.
From dampening harsh echoes to taming boisterous bass frequencies, your DIY efforts can transform a mundane room into a recording haven that even sound engineers would nod to.
The Core of Your Studio: Computer and DAW
At the heart of every home studio beats the mighty duo: a dependable computer and a digital audio workstation (DAW). This powerful pair is your trusty sidekick, capable of turning your musical visions into audible reality. Whether you’re chopping tracks or fine-tuning frequencies, your computer and DAW are indispensable allies in the art of audio production.
However, navigating the tech market can be overwhelming. Worry not, we’re here to guide you in finding the most cost-effective selections.
Selecting a Budget-Friendly Computer
In the digital orchestra of music production, your computer is the conductor. It’s got to keep all the tracks in line and the plugins in check without missing a beat. But before you shell out your savings, know this: a budget-friendly powerhouse with enough RAM to handle the heaviest of sessions and storage to archive your audio adventures is well within reach.
Whether you’re a Mac maestro or a PC prodigy, the right machine will keep your tunes spinning without spinning your wallet out of control.
Finding the Right DAW for Your Needs
Choosing a DAW is like finding the perfect rhythm—it’s got to match your style and flow. From the legendary Pro Tools to the futuristic Ableton Live, each DAW dances to its own beat, offering a symphony of features for every type of music maker.
But hey, if you’re just starting out, why not dip your toes in the water with a free DAW? Audacity and GarageBand can lay down a solid foundation without costing you a dime. And when you’re ready to level up, take advantage of those free trials to find your perfect production partner. Here are some of the other well known DAWs that professionals use:
Equipped with your computer and DAW, you’re primed to delve into the realm of recording equipment. But before you’re swept away by visions of top-tier mics and interfaces, remember, great sound doesn’t require gold-plated gear. It’s about choosing the right tools for the job without draining your pockets.
With a keen eye and a bit of know-how, you can assemble an arsenal of budget-friendly equipment that will have you laying down tracks like a pro.
Microphone Selection for Different Instruments
When it comes to mics, it’s all about capturing the soul of your sound. Whether it’s the raw energy of a drum kit or the delicate overtones of an acoustic guitar, the right dynamic microphone can make all the difference. Dynamic mics like the Shure SM58 are workhorses, ready to tackle the loudest amps and the punchiest snares.
But when you need to catch every nuance of a vocal performance or the gentle strumming of strings, a condenser mic will be your faithful scribe, etching every detail into your recording. An even better option is a virtual microphone system like the Slate Digital ML-1 that give you everything you need. And remember, placement is key—a mic angled just right can turn a good take into a great one.
Choosing an Affordable Audio Interface
Consider your audio interface as a mediator, seamlessly blending the organic essence of your music with your DAW’s digital accuracy. It’s the gatekeeper, ensuring that every note and nuance is captured in pristine clarity. But you don’t need a fortress of inputs and outputs for a home studio; a simple, sturdy interface with a couple of ports will serve you well, especially if you’re a solo act or a dynamic duo. In fact, there are various audio interfaces available in the market that cater to different needs and budgets.
Headphones vs. Studio Monitors
Now, let’s talk about the ears of your studio—headphones and studio monitors. Each serves a critical role in the quest for the perfect mix. Closed-back headphones are your best bet for keeping the outside world at bay while you’re in the zone. But when you’re ready to mix and master, nothing beats the truth-telling transparency of studio monitors.
They won’t sugarcoat your sound, giving you the real deal on every high, low, and everything in-between. Whether you’re tweaking a track or laying down a new one, knowing when to use which can make all the difference.
MIDI Controllers and Keyboards
As you construct your musical masterpiece, MIDI controllers and keyboards add vibrancy and depth to your sonic canvas. They’re not just keys and pads; they’re your direct line to the heart of your software instruments. With a MIDI controller by your side, you’ll sculpt sounds that breathe life into your tracks, making your music production process as expressive as it is efficient.
The Value of MIDI in a Home Studio
MIDI is the magic that makes the inanimate, animate. It’s the spark that ignites the engines of virtual instruments, turning your keystrokes into symphonies. With a MIDI controller, such as a midi keyboard, you can dial in the perfect drum beat, lay down a bass line that grooves, or weave intricate melodies with ease.
It’s about getting hands-on with your music—moving beyond mouse clicks to create something truly touch-inspired.
Cables, Stands, and Accessories
You’ve got the brain and the heart of your studio set up, now it’s time to consider the skeletal system—cables, stands, and accessories. Though they may appear insignificant, these elements form the structural support that ensures a fluid recording session.
From XLR cables that carry your voice to mic stands that hold your sound capture devices in place, these unsung heroes are vital for a stress-free recording experience.
Cable Management and Organization
Cable management is the zen of a studio setup. It’s about turning chaos into order, ensuring that every cable serves its purpose without becoming a tangled mess. Whether you’re routing cables or consolidating them with a snake, a well-organized studio is a productive studio.
Say goodbye to clutter and hello to a clean, streamlined workspace that lets your creativity flow uninterrupted.
Selecting Durable Mic Stands
Choosing a mic stand is like choosing a trusted friend—it needs to hold up under pressure and adapt to whatever situation you throw at it. A durable mic stand not only supports your microphone; it supports your artistic performance, ensuring that every note is captured just as you intended. It’s an investment in reliability that will pay off take after take, session after session.
Crafting Your First Studio Recordings
Entering the realm of recording music signifies a significant milestone for every music producer. It’s where you translate your ideas into tangible tracks that resonate with listeners. But before you hit that record button in the recording studio, there’s a symphony of preparation that needs to happen. From memorizing lyrics to recording vocals and setting levels, each step is a note in the melody of your recording process.
Let’s tune into the essentials for a smooth first take.
Setting Levels and Avoiding Distortion
Setting levels is like seasoning a dish—it’s all about balance. Too much gain, and you’ll drown in distortion; too little, and your sound is lost in the void. The sweet spot lies in the green zone of your meters, where headroom is king and clarity reigns supreme.
It’s about capturing the full dynamic range of your performance without letting it spill over into a noisy mess.
Recording Techniques for Beginners
Now, let’s turn our attention to the craft of recording and editing audio. It’s not just about hitting record; it’s about understanding the dance between the microphone and the sound source. Rehearsal isn’t just practice; it’s a prelude to perfection, minimizing the number of takes and maximizing the quality of your recordings.
Remember, the studio is your playground, so play, experiment, and discover the techniques that resonate with your unique sound.
Software and Plugins to Enhance Your Music
In today’s digital era, software and plugins serve as the artist’s tools, enriching your tracks with depth and vibrancy beyond what was previously conceivable. Some essential tools for shaping your sound include:
Ethereal reverbs
Punchy compressors
Dynamic EQs
Virtual instruments
Synthesizers
Drum machines
These tools, including electric guitar amps, empower you to shape your sound with precision and creativity.
But with so many options, where do you start without splurging? Let’s explore how to elevate your music with software that strikes a chord with your wallet and your artistic vision.
Utilizing Free and Trial Version Plugins
Who says you can’t add professional polish on a shoestring budget? With an array of free and trial plugins at your fingertips, you can sprinkle your recordings with industry-standard quality without the premium price tag. Some of these plugins include:
Frequency analyzers
Compressors
EQ plugins
Reverb plugins
Delay plugins
These gems can help you achieve that radio-ready sound.
So dive into the treasure trove of freebies and trials—the perfect plugin for your masterpiece might just be a download away.
Investing in Versatile Software Instruments
Stepping up your game with a comprehensive suite of software instruments can be a game-changer for your music production. Imagine having an orchestra at your fingertips or a vintage synth collection in your digital rack—all without the hefty price tag of physical gear. These software instruments unlock worlds of sound, giving you the flexibility to compose across genres and elevate your tracks to professional standards.
It’s an investment that amplifies your musical range and versatility.
Optimizing Your Workflow: Tips and Tricks
Every seasoned artist understands that the formula for a masterpiece involves more than just talent; an efficient workflow is key. The smoother the process, the faster you can bring your musical ideas to life. It’s about clearing the clutter, setting goals, and knowing your tools like the back of your hand.
These aren’t just tips; they’re the stepping stones to a seamless creative process that lets you focus on what truly matters: making music that moves the soul.
Budget Considerations: What You Can Expect to Spend
Establishing a home studio signifies a commitment to your musical passion, which doesn’t necessarily mean emptying your savings. A basic home studio setup can be surprisingly affordable, with costs ranging from $500 to $1,500—a small price to pay for the ability to produce music on your terms. But if you’re dreaming of a more advanced sanctuary of sound, your budget might stretch upwards of $3,000 or more, depending on how deep you want to delve into the world of audio fidelity.
Prioritizing Your Purchases
When it comes to outfitting your studio, strategy is key. Start with the essentials:
A reliable computer and DAW are the backbone of your setup.
Invest in quality studio monitors for accurate sound reproduction—a must for mixing.
Choose microphones that suit your immediate recording needs.
Don’t forget to factor in acoustic treatment to ensure your recordings are crystal clear.
Remember, how you allocate your budget should reflect your unique musical journey and the soundscapes you aspire to create.
Navigating Common Challenges for New Music Producers
Initiating your journey in music production is thrilling, though it comes with its fair share of obstacles. Whether you’re facing creative blocks or struggling to finish tracks, it’s all part of the growth process. Embrace these challenges as opportunities to explore different production techniques and to push the boundaries of your creativity.
Remember, limitations can be the mother of innovation, leading to breakthroughs that set your music apart from the crowd.
Summary
From the echoes of your first home-recorded notes to the satisfaction of a polished final mix, setting up a home recording studio is a journey of creativity and discovery. We’ve explored everything from picking the perfect room to optimizing your workflow, diving into the nuts and bolts of building a studio that resonates with your artistic vision. So take these tips, mix them with your passion, and start crafting soundscapes that tell your unique story. Your home studio is more than a collection of gear—it’s a canvas for your musical dreams.
You’ll need a computer with at least 1TB storage, 8GB RAM, a 4-core processor, and an SSD for optimal music production. So, aim for these specs for a smooth home studio setup!
Yes, you can use a budget microphone for professional-sounding recordings, as brands like Shure offer affordable options that still deliver professional results. So go ahead and give it a try!
No, you don’t need an audio interface with many inputs for your home studio. A simple audio interface with 2 inputs should be enough if you’re recording solo or only capturing a few sources at a time.
You can improve your home studio’s acoustics without spending much by using everyday materials like blankets, towels, or foam for DIY acoustic treatment, which can effectively minimize reflections and enhance sound quality.
Yes, investing in MIDI controllers and keyboards for your home studio is worth it, especially if you work with virtual instruments. They provide a tactile and intuitive way to compose and arrange music.
TWO Legendary Subscriptions. ONE Unbeatable Price.
Get ALL of Slate Digital and Solid State Logic’s award-winning plugins in one convenient bundle. Unlock over 100 plugins worth over $12,000. Available now Month-to-Month, Annually Billed Monthly or Annually Billed Upfront.
The best DAW for you depends on your personal workflow, musical genre, and preferences, rather than just choosing the most advanced or popular option.
Consider key factors like operating system compatibility, budget, and user interface when selecting a DAW to ensure it complements your creative process.
Explore both paid and free DAWs, like Logic Pro X and Tracktion T7, to find one that fits your needs and enhances your studio setup with additional equipment like audio interfaces and MIDI controllers.
Selecting the right Digital Audio Workstation (DAW) is essential to setting yourself up for a successful music-making journey. The market offers a wide array of DAWs, so how do you determine which one is right for you?
In this article, we’ll walk you through the most important factors to consider when choosing a DAW to get started with.
Choosing the Right DAW for Your Studio: Expert Tips and Best Picks
As you embark on your music production journey, you shouldn’t worry about sophisticated speaker set up and acoustic treatments right away. Rather, the centerpoint of your focus should be on selecting the best digital audio workstation (DAW) for your workflow.
A DAW serves as an electronic hub for artists, offering a comprehensive platform to:
Create,
Arrange,
Mix, and
Master audio files with precision and creative flair.
Still, one might ponder over which DAW software stands out as the optimal choice. While recommendations may sway towards the most renowned or cutting-edge tools in music production software, selecting an ideal DAW boils down to what best suits your creative processes, musical style preference and personal inclinations. The key lies in exploring each DAW (be it FL Studio or Logic Pro X) and uncovering their unique features until you discover one that resonates perfectly with you.
In short: don’t just pick a DAW because it’s popular or riddled with a list of extra tools you’ll never use. Instead, aim for a DAW that harmonizes effortlessly with how you craft sounds and enhances every stage of your creative workflow.
Introduction
As you stand at the crossroads of music production, ready to dive into the realm of digital audio workstations, the sheer number of choices can be overwhelming. Do you go for a complete daw with every tool imaginable, or start with a free daw to dip your toes into the waters of audio editing? It’s not just about picking a software; it’s about crafting a space where your musical ideas can flourish. The right DAW can transform your production from a jumbled assortment of tracks into a harmonious symphony that captivates listeners.
But how do you navigate this maze of options? How do you know which features are must-haves and which are just nice-to-haves? Fear not, for this article will be your compass, guiding you through the essential components of a DAW. From the nuances of the user interface to the complexities of music composition, we’ll ensure you’re equipped with all the knowledge you need to make an informed decision.
So tighten your seatbelts and prepare for a deep dive into the world of DAWs, where your music composition dreams are just a click away.
Understanding Digital Audio Workstations (DAWs)
A digital audio workstation isn’t just a piece of software. It transforms your computer into a full-blown recording studio. This powerful tool allows you to:
Capture the essence of live instruments
Alter and refine MIDI compositions
Create rich textures using virtual instruments
Blend and perfect your tracks with mixing and mastering features
Trim, splice, and shape your musical creations
Incorporate effects and expand functionality with plugins
This music production software is the canvas that every artist needs to start developing their latest masterpiece. It serves as the foundation for electronic music producers on their quest to churn out dance floor anthems or provides singer-songwriters pursuing authentic acoustic vibes all they need — all within this versatile playground.
The core framework common among most digital audio workstations consists of a timeline-based workspace where imagination meets technology across multiple tracks. Picture it as an expansive canvas where harmonious union occurs amongst audio and midi editing processes, blending each element seamlessly toward crafting auditory artistry. With the ideal D&D at hand, even a rough melody concept can evolve into broadcast-ready material, no traditional recording studio required! These programs grant you freedom—enabling creation from virtually anywhere—the confines of one’s abode or amidst sandy shores become spaces ripe for musical exploration.
Factors to Consider When Choosing a DAW
Selecting the perfect digital audio workstation isn’t just about choosing the most powerful or the most expensive one. It’s about finding the DAW that clicks with your unique style of music production. Imagine trying to fit a square peg in a round hole—that’s what using the wrong DAW feels like. But how do you find your perfect match in a sea of digital audio workstations? By considering a few critical factors that will dictate not just how you work, but how well you work.
These factors range from the technical—like operating system compatibility and your computer’s capabilities—to the practical aspects of budget and the user interface. Think of it as building your dream home; you need a solid foundation, a budget to match your vision, and a layout that flows with your daily routine. The same goes for choosing a DAW—it’s about building a space where your creativity isn’t just welcomed, it’s unleashed.
So let’s delve into these deciding factors and pave the way for your audio editor of choice, one that will resonate with your creative workflow and lead you to produce music that echoes your artistic vision.
Operating System Compatibility
First things first, you need to make sure you select a DAW that sits comfortably within the environment of your computer. Just as one carefully chooses a house to ensure it stands on solid ground, so must you confirm that your DAW aligns with the operating system you use. While some software like Logic Pro X is exclusively available for macOS users, others such as Reaper cater to both Mac and PC enthusiasts alike. This pivotal decision can greatly affect which tools will be at your disposal for crafting music.
The synergy between an operating system and creative software is far from inconsequential. It guarantees that wherever creativity strikes, regardless of location or equipment used (whether collaborating across different platforms or working solo), no technical obstacle disrupts the flow of artistic expression. Thus, before committing to any particular feature-rich DAW like Logic Pro X or its counterparts, affirming compatibility with your existing setup is imperative.
Ultimately, successful partnerships are built upon harmonious connections – this holds true in relationships as well as only ensuring smooth interactions between yourself and the chosen engine driving all aspects of logic pro x production endeavors – your beloved DAW – vital.Successful musical creations.
Budget and Pricing Tiers
Affordability is just as important as feature set. Various price levels exist within the realm of digital audio workstations, and how much you’re willing to spend will greatly influence your choice. Ranging from complimentary daws that provide a glimpse into music production to comprehensive, complete daw systems requiring substantial financial commitment – options are available to suit diverse budgets.
Nevertheless, the best DAW for your needs does not have to be synonymous with steep costs. It should encompass all necessary tools while maintaining fiscal responsibility. It may be tempting to jump right for the top-of-the-line option(s), but more often than not, beginner and mid-tier packages are perfectly sufficient for first-time users. You should also take advantage of trial periods offered by these platforms.
Workflow and User Interface
Your main interaction with your music occurs through the user interface of a DAW—it’s akin to being both the pilot’s cockpit and command center, crucial for steering your creative journey. Not all DAWs are fashioned alike. Some offer an experience similar to navigating a spacecraft’s dashboard—take Ableton Live as an example—while others like Studio One present a more straightforward setup. Your mission is to locate that one DFW whose workflow clicks perfectly with yours—one that naturally fits into your process, empowering rather than obstructing your creativity.
Ponder on this: does a neat and orderly workspace appeal to you or do you flourish amidst spontaneous and adaptable surroundings? The design of your chosen DAW should mirror these inclinations. It ought to be akin to an extension of how you think musically, where the user interface seamlessly integrates into your habits. Devote time for experimentation with diverse workflows. Trust in instinctive choices leading up to what feels most accommodating.
Ultimately, when inspiration strikes vividly, it becomes imperative that nothing hinders its course – especially not by grappling with an incompatible interface hindering harmony between tools and creative expression.
Key Features of Top DAWs
Diving into the ocean of DAWs, you’ll notice certain features that shine like lighthouses, guiding you through the fog of options. Each DAW boasts its unique strengths, including:
Virtual instruments that breathe life into your MIDI tracks
Audio editing tools that polish your recordings
Audio plugins that add color to your sonic palette
These are the software instruments that elevate DAWs from mere software to entire recording studios, offering limitless creative potential.
However, it’s not just about having a wide array of features; it’s about having the right tools for your music production needs. Whether it’s the robust MIDI editing capabilities of Cubase or the real-time performance prowess of Ableton Live, each DAW has its spotlight features that cater to different genres and production styles. So, as you compare the best daws on the market, keep an eye out for those key features that align with your goals as a musician and producer. It’s these features that will help you craft your music with precision, creativity, and ease. Some key features to consider include:
MIDI editing capabilities
Real-time performance features
Compatibility with your preferred plugins and instruments
Workflow and user interface
Mixing and mastering tools
Collaboration and sharing options
By considering these features, you can find the DAW that best suits your needs and helps you create the music you envision.
Audio Recording and Editing Capabilities
At the core of any digital audio workstation is its capacity for both recording and manipulating audio. Capturing a moving vocal performance or assembling complex guitar layers hinges on your ability to adeptly record and modify sounds. DAWs such as Pro Tools are lauded for their robust audio editing tools, equipped with a wide array of features that serve even the most detailed-oriented musicians.
The journey doesn’t stop at simply recording tracks. Modern DAWs offer an expansive playground for sonic alterations where you can:
Chop
Rearrange
Extend
Alter pitch
To fulfill your creative vision. These functionalities enable you to sculpt your audio tracks into ideal forms, guaranteeing each tone and subtle detail is in its rightful place. It’s this degree of mastery over sound that has the power to elevate a solid track into something exceptional – it’s also a critical element to weigh when selecting your digital audio workstation.
MIDI Editing and Virtual Instruments
MIDI editing serves as the digital chiseling process for music, providing a platform where virtual instruments are animated through your touch. When harnessed with a capable DAW, you’re able to:
Construct complex musical elements such as melodies and rhythms without needing physical instruments
Tweak and reshape MIDI data for distinctive performances brimming with expression
Employ MIDI controllers to interactively play and navigate virtual instruments
Utilize quantization features on MIDI recordings to amend timing inaccuracies and enhance tightness in your music
Stack an assortment of MIDI tracks for developing textured, intricate musical compositions
This type of technological sorcery is fueled by Virtual Studio Technology (VST), elevating DAWs into essential assets for both electronic music producers and composers.
Delving in depth. In the realm of virtual instruments, these tools act as the hues you apply onto your digital composition canvas. Whether it’s full-bodied string ensembles or assertive drum machines that pique interest, there exists an immense diversity of timbres at one’s command. Programs like Ableton Live supply a plethora of these synthetic sounds, offering avenues to venture into previously uncharted auditory spaces while enlarging creative potential. Thus, whether orchestrating grand symphonies or piecing together hip-hop grooves, mastery over both midi tracks through meticulous editing processes coupled with rich libraries found within programs equipped with this technology provide countless opportunities within compositional craftwork.
Plugin Support and Integration
An essential component of any digital audio workstation’s ecosystem is the inclusion of audio plugins. These essential tools are akin to condiments that enhance your audio tracks, offering a transformative ability to elevate an ordinary mix into a vibrant auditory landscape. Through the incorporation of plugin support, you gain access to a vast array of features including utility resources, virtual instruments and an assortment of audio effects that amplify the capabilities within your DAW.
The focus shouldn’t be solely on having numerous options. Rather it’s critical to prioritize quality and compatibility with popular formats such as VST and AU for harnessing true creative power. Integrating high-caliber plugins like those from Slate Digital could spell out the difference between a basic home recording and polished professional work. When selecting among various DAWs, deliberate over their respective plugin ecosystems carefully—opt for one that not only fulfills but also enhances your artistic objectives through seamless integration and robust support mechanisms enabling full realization of your acoustic creations.
Comparing Popular DAWs for Your Studio
Having established the basics, we’re now ready to focus on some of the leading digital audio workstations (DAWs) in the music production realm. Each DAW is akin to a luxury vehicle, boasting distinct features and subtleties that appeal to varying types of musicians and producers. Key players include:
Logic Pro X
FL Studio
Pro Tools
Cubase
Ableton Live
Each platform has its distinguishing characteristics worth exploring in detail.
For those who are engaged in producing electronic music and require a DAW capable of managing live sets, or recording engineers demanding impeccable sound quality, there exists a tailored solution within these options. With offerings ranging from Logic Pro’s polished user experience to FL Studio’s formidable capabilities for crafting beats, every one of these top-tier DAWs brings something unique to the table when it comes to branded methods for creating music. When drawing comparisons among these titans of industry, take into consideration your own creative techniques as well as essential functionalities you expect from your workflow toolbox.
Logic Pro X
For those deeply ingrained in the Apple ecosystem, Logic Pro X may be your digital audio workstation of choice. This robust platform excels with its flawless compatibility with Apple devices and boasts a vast array of virtual instruments and effects within its libraries. Priced at $199.99, it serves as an accessible yet professional-grade DAW that caters equally to novices making the leap from GarageBand as well as expert producers in search of sophisticated functions.
Despite its strengths, some users note certain shortcomings within Logic Pro X’s audio editing capabilities and sometimes find the workflow less intuitive compared to other competing DAWs like Studio One. Being limited to macOS leaves Windows aficionados needing alternative solutions for their music production needs. Still, for members of the Apple fraternity seeking a thorough and integrated music creation experience, Logic Pro remains a formidable contender in this space.
FL Studio
FL Studio, once known as “FruityLoops,” has come a long way from its origins as a MIDI drum machine. Today, it stands tall as a favorite among hip-hop producers and electronic musicians thanks to its intuitive beat-making tools and a modular environment that encourages creativity. With a history that stretches back to 1998, FL Studio has evolved into a full-fledged DAW that’s not only beginner-friendly but also packs enough punch for the pros.
This DAW is particularly appealing for pattern-based musicians who might find its features conducive to their workflow. Some of the key features of FL Studio include:
Step sequencer
Loop arrangements
Mixer
Sequencer
Array of VSTs
These features have undergone significant improvements, bringing FL Studio on par with “serious” DAWs. Despite some perceptions that its workflow is less suited for complex arrangements, FL Studio’s strong online community and a wealth of resources make it an attractive option for producers looking to make their own music in the hip hop or electronic genres.
Pro Tools
Pro Tools is widely regarded as the core element of music production in many top-tier recording studios worldwide. Renowned for its outstanding audio processing and comprehensive support for plugins, mastering Pro Tool’s intricacies is like becoming fluent in a universal language of the industry that allows seamless collaboration and offers portability of skills among various studios and projects.
Although there exists a complimentary version of Pro Tools, it may not be sufficient for more complex demands associated with professional audio editing and production tasks. If you prioritize recording live instruments within your work and desire a Digital Audio Workstation (DAW) recognized throughout the music production landscape, then Pro Tools stands out as an ideal option. It provides all necessary tools required to achieve high-quality sound output worthy of professional standards.
Cubase
Cubase, developed by Steinberg, is a stalwart in the DAW landscape, boasting a reputation for powerful MIDI capabilities and a comprehensive virtual instrument library. Its arrangement view offers a familiar layout for those used to traditional linear DAWs, but with an extensive set of features that cater to detailed audio editing and plugin use. For musicians and producers who revel in MIDI composition and require a strong set of built-in tools, Cubase is a solid choice.
However, some users may find Cubase’s interface to be cluttered, which could impact workflow efficiency. Despite this, Cubase’s integration with MIDI hardware and powerful audio manipulation tools make it a standout option for those who prioritize these aspects in their music production. With Cubase, you gain access to a DAW that’s versatile across genres and rich in functionality, allowing you to finesse your music to the highest standards.
Ableton Live
Ableton Live has become a hallmark of performance within the electronic music realm. Renowned for its innovative interface and capabilities to manipulate sounds in real time, it stands as the preferred software for electronic artists eager to inject energy and fluidity into their performances. Although it may initially present a steep learning curve, once grasped by users, Ableton’s distinctive approach to crafting music becomes invaluable — providing a composition workflow that is considered second-to-none.
Key highlights of Ableton Live include:
The Session View offering an instinctual space conducive to on-the-fly arranging and clip improvisation
A comprehensive selection of embedded instruments and effects
Robust support for various MIDI controllers
With these robust features at one’s disposal, Ableton Live emerges as an essential fixture not just in live venues where artists shine, but also serves as a powerful resource in both studio settings and onstage acts.
Free DAWs to Get You Started
For those just beginning their music production journey or operating on a tight budget, there are several free DAWs that offer a surprising amount of functionality. These platforms provide a great opportunity to get your feet wet without financial commitment, allowing you to explore the basics of recording, composing, and mixing. Tracktion T7 and GarageBand are two such DAWs that stand out for their user-friendly interfaces and robust feature sets, making them ideal for novices.
While these free DAWs may not offer all the advanced features of their paid counterparts, they are more than capable of getting you started on the path to creating music. With options like Tracktion T7 providing unlimited audio and MIDI tracks, and GarageBand offering a suite of samples and virtual instruments, these DAWs are proof that you don’t need to invest a fortune to begin crafting your own music. They serve as stepping stones, giving you the foundational tools to develop your skills before you consider upgrading to a more complete DAW.
Tracktion T7
Available at no cost, Tracktion T7 is a robust DAW boasting an array of powerful features for users who are budget-conscious. It accommodates unlimited MIDI and audio tracks, which allows ample room for experimentation and project expansion in your music production endeavors. The interface of Tracktion T7 favors ease-of-use with its single-screen design that streamlines the workflow within the music creation process.
Though it may not have some high-end functionalities present in costly DAWs, Tracktion T8 delivers on all vital fronts including extensive tools for editing audio as well as compatibility with various file types. Its most significant constraint lies in limited support for external plugins. The native instruments and effects provided should more than meet the needs of those just venturing into the realm of music production.
GarageBand
For macOS users diving into music production, GarageBand stands as an easily accessible starting point. Its user-friendly interface and simple editing capabilities allow novices to dive into creating music without delay. The software comes packed with a substantial selection of samples, virtual instruments, and presets that are perfect for those passionate about MIDI.
Even though it’s designed for simplicity, GarageBand doesn’t skimp on functionality necessary for crafting tunes. It includes fundamental features needed to tweak audio files such as loop creation and timing adjustments. For newcomers seeking a straightforward initiation into DAW software, this program acts as the ideal precursor before venturing into more sophisticated production environments like Apple Logic Pro.
Enhancing Your Studio Setup
After you’ve selected your DAW, the subsequent step is to upgrade your studio environment to maximize the potential of your chosen software. This entails evaluating components such as computer specs, audio interfaces, and additional equipment, which are all pivotal in the realm of music production. An intelligently assembled studio setup enhances not just how you work, but also elevates the sound quality produced by your recordings.
Consider viewing your studio configuration as a physical enhancement of what’s possible with your DAW. Every piece should serve to augment and bolster what you can achieve within that digital domain. From selecting premium monitoring headphones to ensuring robust power supplies, each element plays an integral role in shaping the final output of music production. Committing resources into high-quality gear pays dividends by granting you enhanced ability to precisely capture and refine sounds, delivering unmistakable clarity and accuracy in audio results.
Audio Interfaces and Compatibility
The audio interface acts as a critical intermediary between your analog gear and digital recording domain, significantly influencing the caliber and versatility of your recorded sound. It affects how many tracks you can lay down at once, the fidelity of those recordings through sound resolution, and also what outputs are at your disposal. Choosing an audio system is essential to opt for one that aligns well with your DAW while providing all necessary inputs/outputs in order to accommodate all your equipment.
Investing in an appropriate audio interface helps tackle latency challenges, which keeps the timing between recording input and playback output tight. It plays a key role in preserving synchronization throughout tracking sessions. Ensuring it meshes well with DAW leads to fewer complications during recording processes. When considering upgrades for our studio rig, prioritize selecting an aduio rig that doesn’t only address immediate requirements but also offers flexibility for later advances.
MIDI Controllers and External Gear
MIDI controllers act as the bridge for your musical expression, enabling direct manipulation of virtual instruments and settings within your DAW. They provide a physical connection to your music creation process, enhancing both intuition and involvement. Whether you are orchestrating with a MIDI keyboard or fine-tuning synth parameters using a control surface, these tools can greatly optimize your production flow.
Integrating external equipment such as synthesizers and drum machines can enrich the layers and individuality of what you produce. By bringing these devices into your assembly, you diversify the range of sounds at hand while inviting novel avenues for inventive exploration. Adequate USB organization along with confirming that everything meshes well with your DAW is crucial in fostering an efficient workspace without unnecessary complications.
Summary
In wrapping up our journey through the world of digital audio workstations, it’s crucial to keep in mind that the most suitable DAW for you is one that aligns perfectly with your music creation process and artistic sensibilities. Be it a robust platform teeming with features like Logic Pro X or an intuitive and gratis option such as GarageBand. The prime consideration should be selecting a DAW that enhances your ability to craft music creatively.
Ultimately, your chosen DAW transcends being mere software—it becomes a collaborative companion on your path to artistry, shaping and defining the auditory essence of your work. Allocate time for exploration and trials until you discover the Daw version which truly acts as a natural extension of yourself musically speaking. With an ideal arrangement complemented by creative zest, there’s no limit to what you can achieve within music production—so embark on this quest fervently!
Find a DAW that offers an easy-to-understand interface and a smooth learning curve, along with extensive features to foster creative experimentation without causing you to feel swamped. Confirm that it is within your financial means and supports your operating system.
Certainly, it’s possible to integrate plugins from various providers into your DAW, provided that they adhere to a compatible plugin format such as VST or AU. Verifying their compatibility with your particular DAW is crucial.
Certainly, acquiring an audio interface is advisable if you’re aiming for enhanced sound quality and greater versatility during recording sessions with your DAW.
For those committed to music production, it’s a valuable component to add to your setup.
Beginning with free DAWs offers learners the opportunity to develop their skills without any financial stress. As one’s abilities evolve, it may prove advantageous to invest in a paid version that comes equipped with sophisticated functionalities.
TWO Legendary Subscriptions. ONE Unbeatable Price.
Get ALL of Slate Digital and Solid State Logic’s award-winning plugins in one convenient bundle. Unlock over 100 plugins worth over $12,000. Available now Month-to-Month, Annually Billed Monthly or Annually Billed Upfront.
Armed with a killer ear and a love for all things music, JESSE RAY ERNSTER’s journey began in the heart of Minnesota. Born into a musical family, the Grammy winner started honing his craft early, starting in local studios before branching into his own engineering exploits.
Since then, he has exploded onto the scene, working with everyone from indie darlings to chart-topping pop sensations, securing several platinum records and major accolades in the process. Overflowing with Midwest charm and even more talent, Jesse Ray Ernster has quickly established himself as a go-to guru for shaping your songs to perfection.
SLATE DIGITAL: Okay, first things first. For those who don’t know: who is Jesse Ray?
JESSE RAY ERNSTER: Well, I am a 32-year-old musician, record mixer, music lover, and California outdoors enthusiast. I come from the cold Midwest. I was born in Canada but raised primarily in Minnesota. My folks were musical, so this was the world that I came up in. It’s been a lifetime of music and working on the craft. It’s what I obsess about. It’s the only thing I can think about and the only thing I want to be doing at any point throughout the day, on any given day.
SD: I was reading an interview that you did where you talked about renting a cabin straight out of high school that you used to record your friends and bring people in, and that the vibe in that space was just really kind of unique. Can you talk a little bit more about that process and that whole experience?
JRE: I would love to! Nobody ever asks about that.
I called it Echo Cabin. It was a 900-square-foot one-story cabin with two bedrooms and a basement that had a laundry room and a brick garage. The upstairs was an all-pine interior, so the walls and the ceiling were pine and then the floors were made of oak and this was part of the deal that I would get to move in and rent.
My buddy was the landlord. I told him I’d rip out all the old rotten carpet and refinish the flooring. I wanted to turn it into a vibey recording house, so I did all that work in exchange for a good deal on rent, specifically $400.00 a month on this unbelievable lakefront property. Right out the window was Buffalo Lake. I could walk out the back door down the steps and I’d be right at the water. It was amazing.
The view of the lake from Echo Cabin.
It was such a valuable experience. I was terrible at making records; this was literally my first place after I left my dad’s studio. I’d been getting my feet wet on his antiquated Pro Tools set up, so I was eager to rebel against that and do everything the opposite way.
I got different monitors, my trusty NS10’s. I used a different DAW and pivoted to Logic Pro 9. I was trying to forge my own path and figure it out. I had a drum kit in there that was mic’d up at all times, some guitar amps, a vocal mic and a little vocal booth I’d set up. I also had mics down the stairwell to pick up the ambience of the space.
That place was incredible, because it‘s where I got to learn how to engineer. I was working with a lot of country bands and some rock bands, and even a lot of college acapella projects. That was a gig I got pretty good at, so I kept getting calls.
SD: What are the core differences between an acapella mix session and a Burna Boy mix session? Are there any significant adjustments you need to make between the two?
JRE: You’d be surprised how similar they are! But one thing that was so specific about those sessions was this: let’s say you have 12 people in the acapella group, and we’re usually quad-tracking every single part. That’s about 50 vocal tracks just to make up the body of the core supporting vocal. Then there’s always a lead in the middle, and then there’s the percussive tracks, just so many stacks of vocals.
When I attacked those stacks with compression, even applying just a DB of gain reduction, I found that it was a nightmare for noise and hiss. At first, I thought it was just the room we were recording in or the way we were recording. But when we eventually ended up going to a professional room that had a proper vocal setup, we ran into the same issue. That taught me early on that compression isn’t going to achieve the vocal leveling effect I’m looking for. I have to go through and level those vocals out with manual automation and ignore compressors. They can quickly do more harm than good.
SD: You strike me as a person who is very appreciative of history. The history of music in Minneapolis and across Minnesota is so rich and deep, it feels like it gets lost in comparison to the more widely renowned histories of Detroit or Memphis. What was it like for you as a developing musician growing up in that environment?
JRE: Well, obviously, that song “Funky Town” was written about Minneapolis. When you think about the history of funk and the role Prince played, it was all really influential. My favorite way to connect with that history was to go down to Bunker’s [Music Bar & Grill] on a Sunday or Monday night and listen to the house band Doctor Mambo’s Combo, which was Michael Bland and Sonny T, just the most unbelievable group of musicians that would play. It was really inspiring.
More recently, another Minneapolis guy Cory Wong has gone on to completely dominate the universe. And another dude, Jeff Braun, this great country mixer who does, like, everything now. He grew up like 15 minutes from where I grew up. We both grew up doing this and being interested in music, but it took until we both ended up living in Nashville for us to finally be like ‘Hey, we’re from the same city!’
SD: Something else I learned that stood out to me while I was prepping for our conversation was that you’ve ditched the traditional mixing desk for a more on-the-go sort of workflow. Is that still the case?
JRE: Yep. I went through a phase of needing to have a spaceship desk and needing to validate my worth as an engineer in the form of having a rack full of gear and equipment, which is funny because now, I don’t think that there’s a correlation there at all. And frankly, when I got rid of the spaceship desk and all the stuff that was sitting between me and the speakers, it ended up sorting out the acoustics and alleviating a lot of the sonic issues I’d been struggling with forever.
Jesse Ray working in his custom mixing studio environment, surrounded by his trusty NS10 monitors.
I think it’s really empowering to promote using limited gear or budget gear to get pro results. That’s the main message I want to send to anyone doing this: you can do this without breaking the bank or putting yourself into an uncomfortable financial position. I’m speaking from experience because I do not come from a place of financial prosperity. I had to save up every single penny to buy the things that I have.
You can do the job with some NS10s and mixing in the box with great plugins. Just keep it simple and worry about getting the room right, getting the right monitors, etc.
SD: How did the Burna Boy connection come about?
JRE: We were connected through my manager right around the time that my manager Matthew signed Burna to Atlantic. I reached out to him and his team and said, ’Hey, I would love to meet with you and talk about you and your company Bad Habit managing me.’ We got together, and they were like, ’Yep, this seems like a great fit. Now let’s see if you can execute.’ The very first thing that they put me on was the first Burna Boy EP that we did and that went great.
So then right after that, they put me on the full album project, which was the “African Giant” album, which was the very first full-length label album I had ever mixed. I’m very grateful to have worked on this album that became significant for the culture and has become a widely celebrated record in many parts of the world.
SD: What does your workflow with Burna look like these days?
JRE: He has an engineer, Otis, who does all the recording and takes care of all the sessions. Then when it’s ready for mix, they send me that stuff and then I mix it. I’ve never recorded Burna, I’ve only ever been the mixer, but there was a stage between “African Giant” and “Twice as Tall” where they didn’t even have a recording engineer. Somebody would record him, and they would send me blank vocals.
We built the whole “Twice as Tall” album over the pandemic over Zoom over Audiomovers. Burna was over there, I was over here, and we built the sounds for every single song, trying new things and getting creative. We got to produce his vocal sound from the ground up on that album, so the fact that it won a Grammy is awesome.
I think that the way you achieve [a] Zen state over time is by repeatedly facing that fear and learning, ‘I’m OK, I’m safe.’ …You just keep going. You just gotta focus on the things that matter.
SD: With an artist like Burna or Doja for example, or any project with major label expectations attached, do you feel any added pressure when you’re working on a major label project, or do you feel the same pressure regardless of the, for lack of a better word, ‘stature’ of the artist?
JRE: Really good question. Early on I would get very psyched out when the stakes were high. If it were label or a big artist, or there was a big opportunity or a spec mix like a test mix to try out, you know I would get psyched out and I would overthink it, and the results are almost always worse in that situation.
I’ve gotten to a point now where I’m really getting comfortable with my monitoring and with my workflow and I think I’m starting to get results that I’m pleased with. So now when I get a project, whether it’s big or small, I’m generally just diving in and tackling the problems and approaching it and just trying to have a really good time doing it.
Ultimately, if I can keep my equilibrium and keep overall pressures low, then things go well: when I don’t overthink it, I can just have a good time. It’s almost like the fear of messing up an opportunity can influence me to head in the wrong direction.
SD: How do you achieve that calm and stay focused on the moment?
JRE: I think that the way you achieve that Zen state over time is by repeatedly facing that fear and learning, ‘I’m OK, I’m safe.’ And it’s true. I’m not running through the jungle being hunted or fighting for my life; I am just working on music. That’s all it is. And the worst of the worst of the worst consequence is that maybe you’re not the right fit for the gig and you don’t get the gig. And like, yes, that would be terrible. But guess what: I have lost so many gigs.
I talk about this a lot. I’ve lost huge gigs that could have put me on a better path than I’m on. And that could be really upsetting, but it’s just not my style to dwell on those alternate timelines or those potentials. You just have to focus on the things that you can change, and remember that there’s always gonna be opportunities. There’s always more. You just keep going. You just gotta focus on the things that matter.
SD: So since this is a Slate Digital interview, I have to ask: are there any SD standbys that have existed in your workflow?
JRE: Yeah! I have Transient Shaper in my template. I’m using that on drums, but also as a de-esser on vocals as well. And a new favorite of mine has been Heatwave. It’s just beautiful.
SD: Can you talk a little bit about your Transient Shaper de-essing technique? I don’t know that anybody’s ever talked about using it that way.
JRE: So I’ll use the Focus feature to target the upper quadrants of the frequency range. I’ll listen for those transients that cut through and turn them down, and sometimes I’ll turn the warmth up to add some extra overtones and density to T’s.
I’ll also sometimes pick the exact same focus range in the Sustain section and turn that dial down too. A lot of the time with ‘S’ sounds, the issue is that they get sloshy. Being able to focus on where the sibilance is and turn both the transient and sustain down produces an effect that really helps.
SD: Is there anybody you haven’t gotten to work with yet that you’d like to do some more stuff with?
JRE: Oh yeah, 100%. I really want to work and collaborate with Stewart Copeland on something. Even if it’s just like a session, like getting him to track on something, or maybe we make some piece of software together, I don’t know. I just really, really want to connect with Stewart Copeland.
As far as more modern pop-leaning stuff, there’s Dua Lipa, but that’s my buddy Gudwin’s gig. Or Ice Spice! But that’s my buddy Teezio’s gig.
SD: He’s having a real moment right now, isn’t he? Teezio’s been getting a lot of attention.
JRE: Can you put this in the interview? He has worked for this. He has earned it. He deserves it.
SD: It’s in.
JRE: Teezy goes crazy.
SD: I guess we can leave off with your standard end-of-interview question: What’s next on your calendar? Anything cool we preview or highlight?
JRE: Yeah, I just worked on the mix for a new G-Eazy record called “Femme Fatale” that’s pretty rad. Otherwise, I’m just going to keep my head down, keep making music, and try to stay out of trouble this year. You folks do the same.
SD: Thank you, Jesse! We will. — Listen to Jesse Ray Ernster’s work below:
In the realm of home recording, achieving professional-quality results doesn’t always require expensive gear or a state-of-the-art studio.
With the right techniques and practices, you can capture stunning audio recordings that rival those produced in top-tier facilities. Whether you’re setting up a home studio, have limited resources, or are totally new to recording, understanding best recording practices is essential for success.
Getting Started
In this guide, we’ll explore some of the best recording practices tailored specifically for home studio enthusiasts.
Creating an optimal recording environment doesn’t necessarily mean constructing a soundproofed studio from scratch. Instead, focus on minimizing external noise and controlling reflections within your existing space:
Choose the Right Room
Select a room with minimal background noise and ambient distractions. A bedroom, basement, or even a closet can serve as a suitable recording space with a few adjustments.
Reduce Reflections
Hang blankets, curtains, or acoustic panels on the walls to absorb reflections and minimize reverberation. This simple step can significantly improve the clarity and fidelity of your recordings.
Isolate External Noise
Close windows and doors to block out external sounds, and consider investing in a good pair of headphones for critical listening and monitoring.
Position Your Microphone Correctly
Proper microphone placement is crucial for capturing clean, balanced recordings with minimal unwanted artifacts. Follow these guidelines for optimal microphone placement:
Maintain Consistency
Keep the distance and angle between the microphone and the sound source consistent throughout your recording session to ensure uniformity across tracks.
Experiment with Placement
Don’t be afraid to experiment with microphone placement to find the sweet spot for each instrument or vocalist. Small adjustments can make a significant difference in the overall sound quality.
Mind the Room
Pay attention to the room’s acoustics and adjust microphone placement accordingly. Position microphones away from walls and corners to minimize reflections and achieve a more natural sound.
Use Proper Gain Staging
Gain staging is essential for ensuring a proper signal-to-noise ratio and avoiding distorted recordings. Follow these steps to achieve optimal gain staging:
Set Input Levels
Adjust the input gain on your audio interface or mixer so that the loudest parts of your signal peak just below 0 dBFS. Make sure to Avoid clipping, as this can result in irreversible distortion.
Monitor Levels
Keep an eye on your levels throughout the recording process to ensure they remain consistent and within an appropriate range. Use your recording software’s metering tools to monitor signal levels in real-time.
Avoid Overloading
If your signal is consistently clipping or distorting, reduce the input gain and adjust your recording levels accordingly. It’s better to record at a lower level and boost the volume later in the mixing process than to risk clipping during recording.
Pay Attention to Room Acoustics
Even in a home studio environment, room acoustics play a significant role in the quality of your recordings. Here are some tips for optimizing room acoustics on a budget:
DIY Acoustic Treatment
Consider building your own acoustic panels using affordable materials like fiberglass insulation, wooden frames, and fabric. There are plenty of online resources and tutorials available to guide you through the process.
Strategic Furniture Placement
Arrange furniture and other objects in your recording space to help break up reflections and diffuse sound waves. Bookshelves, sofas, and curtains can all contribute to a more acoustically balanced environment.
Experiment with Mic Placement
Use microphone placement to your advantage by positioning microphones to minimize room reflections and capture a more direct sound from the source.
Embrace the Power of Editing
Even the most meticulously recorded audio can benefit from a bit of post-production editing. Here are some basic editing techniques to enhance your recordings:
Trimming and Cutting
Remove any unwanted noise, clicks, or pops from your recordings by trimming the audio waveform using your recording software’s editing tools.
Equalization (EQ)
Use EQ to shape the tonal balance of your recordings, emphasizing desired frequencies and cutting out unwanted resonances or harshness.
Compression
Apply gentle compression to smooth out the dynamics of your recordings and ensure a more consistent volume level.
Reverb and Effects
Experiment with reverb, delay, and other effects to add depth and dimension to your recordings. Just be sure to use them sparingly and tastefully to avoid overwhelming the mix.
Invest in Quality Equipment Wisely
While you can certainly achieve great results with budget-friendly gear, investing in high-quality equipment will make a significant difference in the long run. Here are some essential pieces of equipment worth investing in:
Microphones
Invest in versatile, high-quality microphones that can handle a variety of recording tasks. Look for mics with transparent sound reproduction and durable construction.
Audio Interface
Choose an audio interface with low-latency performance, high-quality preamps, and ample input/output options to accommodate your recording needs.
Monitors and Headphones
Invest in a pair of studio monitors or headphones with accurate frequency response and comfortable fit for critical listening and monitoring.
Room Treatment
Allocate some budget for acoustic treatment materials to improve the sound quality of your recording space and minimize unwanted reflections.
Setting up a home studio on a budget doesn’t mean compromising on quality.
Conclusion
By following these best recording practices and techniques, you can achieve professional-grade results without breaking the bank. Focus on optimizing your recording environment, mastering proper microphone placement and gain staging, and embracing the power of post-production editing to enhance your recordings. As long as you prioritize the right things, you’ll be making pro-level recordings in no time.
Whether you’re a musician, a podcaster, a streamer, or a content creator, choosing the right studio microphone is crucial for capturing high-quality audio regardless of recording space, especially if you’re trying not to break the bank.
In this short guide, we’ll explore the different types of studio microphones available, essential points to consider when buying, and what to prioritize when working with a limited budget.
Understanding Studio Microphone Types
Before diving into specific features and considerations, let’s first understand the basic types of studio microphones:
Condenser Microphones
Known for their sensitivity and ability to capture detailed sound, condenser microphones are common in studio settings. They require phantom power to operate, which comes from audio interfaces or mixing consoles.
Dynamic Microphones
Dynamic microphones are rugged and versatile, making them ideal for recording loud sound sources like drums and electric guitars. They don’t require phantom power and are less sensitive than condenser microphones.
USB Microphones
These microphones have built-in analog-to-digital converters and connect directly to your computer via USB. While convenient for beginners and those with limited space, most may not offer the same level of audio quality as traditional studio microphones.
What to Look For
When shopping for a studio microphone, here are some essential things to keep in mind:
Versatility
Look for a microphone that can handle a variety of recording tasks. Versatile microphones can save you money in the long run by eliminating the need to purchase multiple microphones for different purposes.
Durability
Whenever possible, make sure to examine a microphone’s build quality before you buy to ensure it’s sturdy and well-made. Pay close attention to the details: you’ll want to learn what materials were used in its construction, and it’s always good practice to get a sense of the microphone’s overall feel in your hand before bringing it back to the studio.
Frequency Response
A microphone’s frequency response determines how accurately it reproduces different frequencies. A flat frequency response is ideal for accurately capturing natural sound. Microphones with tailored frequency responses, meanwhile, are better suited for specific applications, like recording vocals or particular instruments.
Polar Patterns
When buying a microphone, you should also think about its polar pattern. This refers to a microphone’s sensitivity to sound from different directions.
Here are the three most common polar patterns you’ll encounter in a recording environment:
Cardioid microphones are most commonly used in studio settings, as they only capture sound from sources placed directly in front of them.
Figure-8 microphones pick up sound sources from the front and back, which makes them great for duets or interviews with minimal bleed.
Omnidirectional microphones capture sound equally from all directions. This makes them ideal for capturing ambient sounds or group recordings.
Sensitivity and SPL
Check the microphone’s sensitivity and maximum sound pressure level (SPL) capacity before you buy it. Higher-sensitivity microphones are great for detailed captures of quieter sounds. Conversely, microphones with high SPL thresholds can handle louder sounds without distortion.
Compatibility
Finally, ensure the microphone you’re considering is compatible with your existing recording equipment. Check the connection type (XLR or USB) and ensure it will work with your current audio interface, mixer, and computer.
Our Favorite Studio Microphones
While there are many affordable studio microphones on the market, the Slate Digital ML-1 microphone and Virtual Microphone System offer exceptional value and versatility for the price.
The ML-1 Modeling Microphone
The ML-1 is a high-quality condenser microphone that delivers professional-grade sound reproduction at an affordable price point. Its flat frequency response and cardioid polar pattern make it perfect for a wide range of recording applications, from vocals and acoustic instruments to drums and guitar amps.
The Virtual Microphone System (VMS)
The VMS software complements the ML-1 microphone by emulating the characteristics of classic microphones and preamps. With a selection of meticulously modeled microphone and preamp combinations, the VMS allows you to achieve the sound of vintage studio equipment without the need for a large budget or extensive gear collection.
By combining the Slate Digital ML-1 microphone with the Virtual Microphone System, you can access a diverse palette of sonic possibilities without breaking the bank. Whether you’re recording vocals, instruments, or podcasts, the ML-1 and VMS provide professional-quality results that rival much more expensive studio setups.
Conclusion
Choosing the right studio microphone for your home studio doesn’t have to be a stressful or super-expensive process. Stay mindful of your budget and specific recording needs, and you’ll find an affordable professional microphone that delivers professional-grade audio without sacrificing quality.
With the right microphone in your arsenal, you’ll be well-equipped to unleash your creativity and produce amazing recordings regardless of your studio space.