In the first part of our introduction to synthesis, we covered the primary functions of a standard synthesizer. Today, we’re going to be going a bit deeper into the two components that really make them sing—envelopes and LFOs.
Let’s start with envelopes. An envelope is responsible for the modulation of a sound over time. To “modulate”, in this case, means to change a specific parameter or control.
Last time, we briefly touched on the most common type of envelope you’ll find on any synthesizer: Attack, Decay, Sustain, Release, or more commonly, ADSR. Let’s look at what those controls actually do.
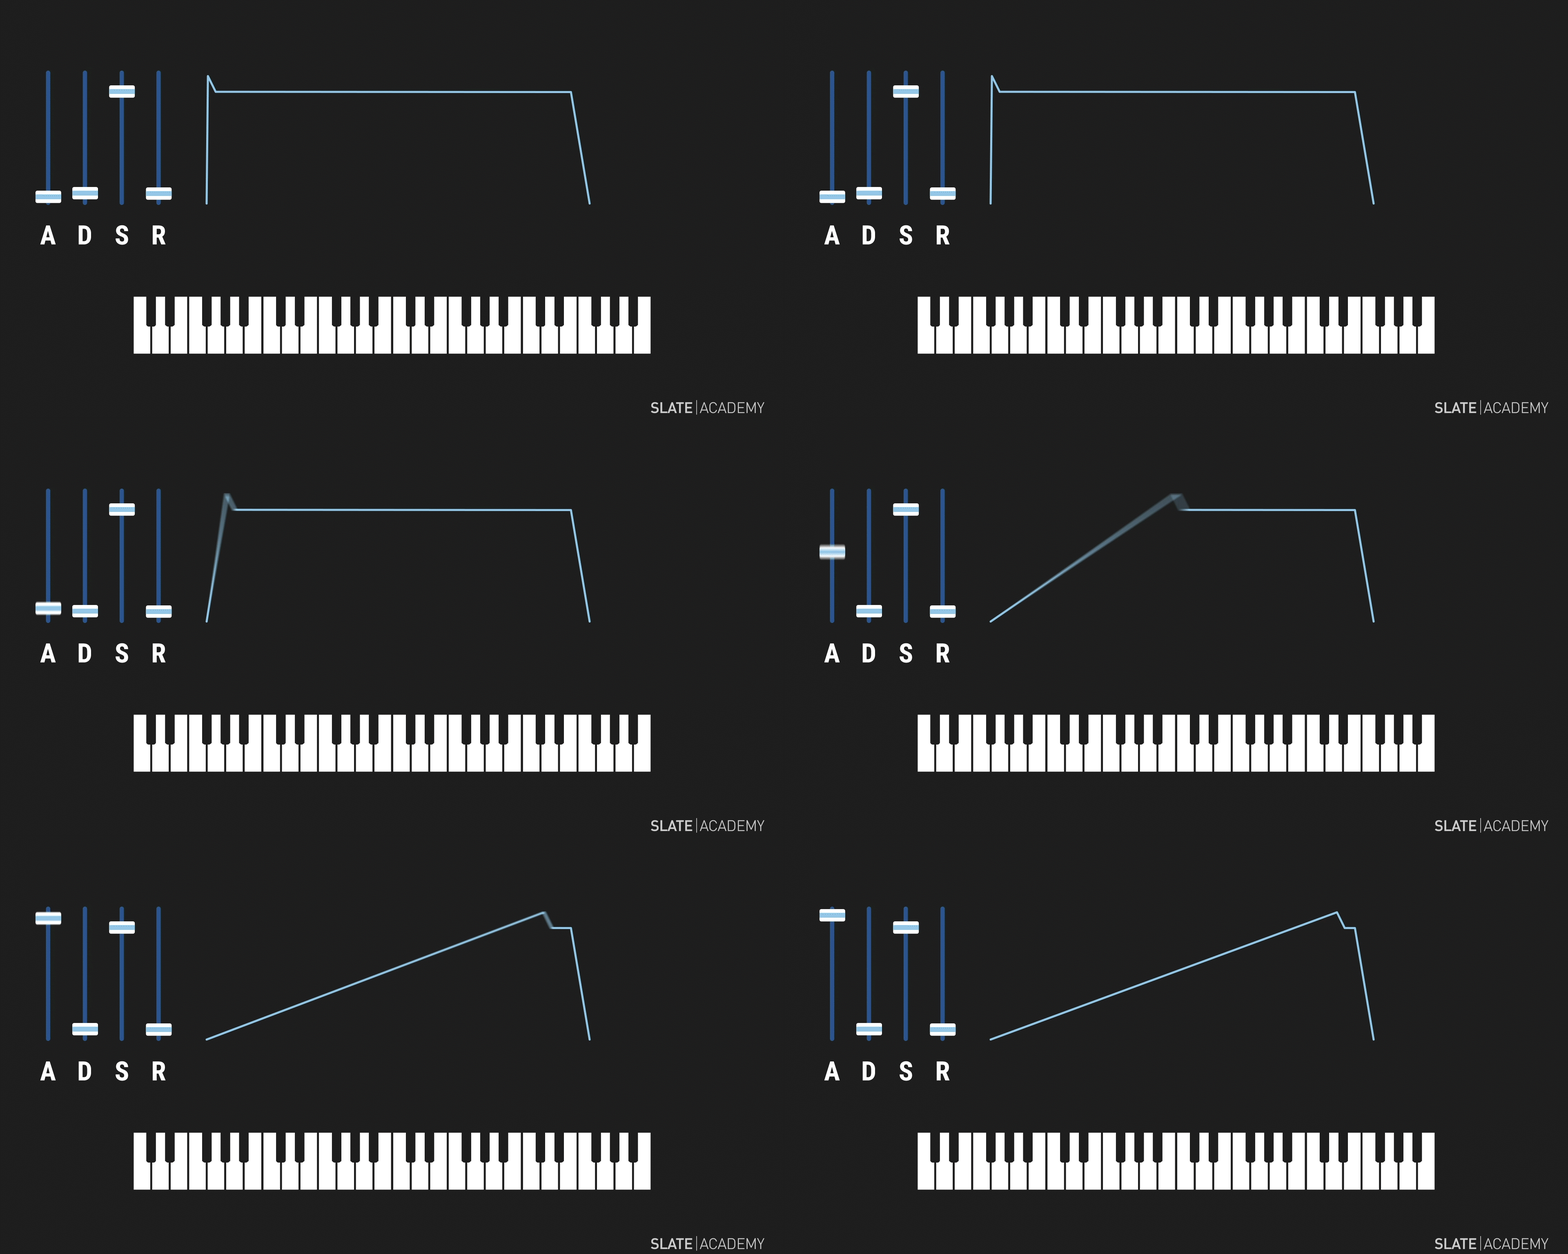
The attack controls the beginning of the envelope and how long it takes for the sound to reach full amplitude. Simply, the faster the attack, the quicker the response; similarly, with a slower attack comes a slower climb to the top.
Attack
The two controls on an ADSR envelope that address the “middle” of the sound in question are the sustain and decay.
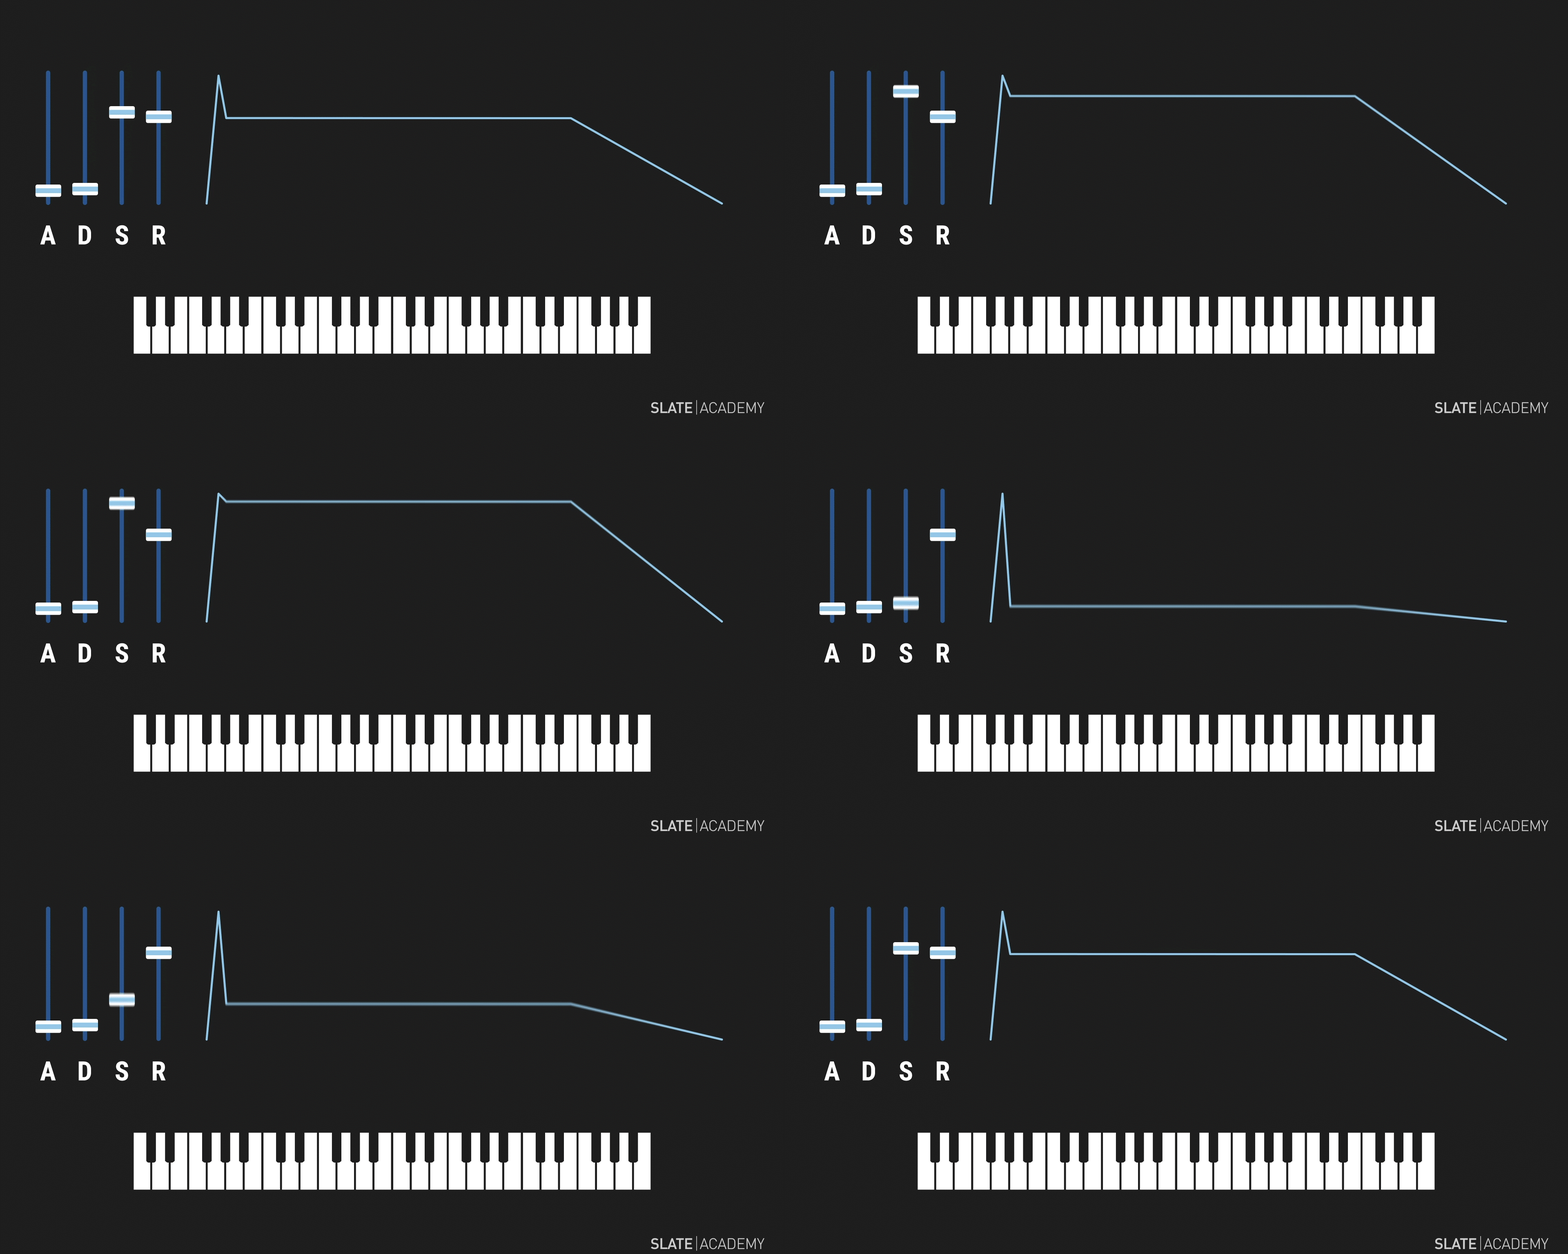
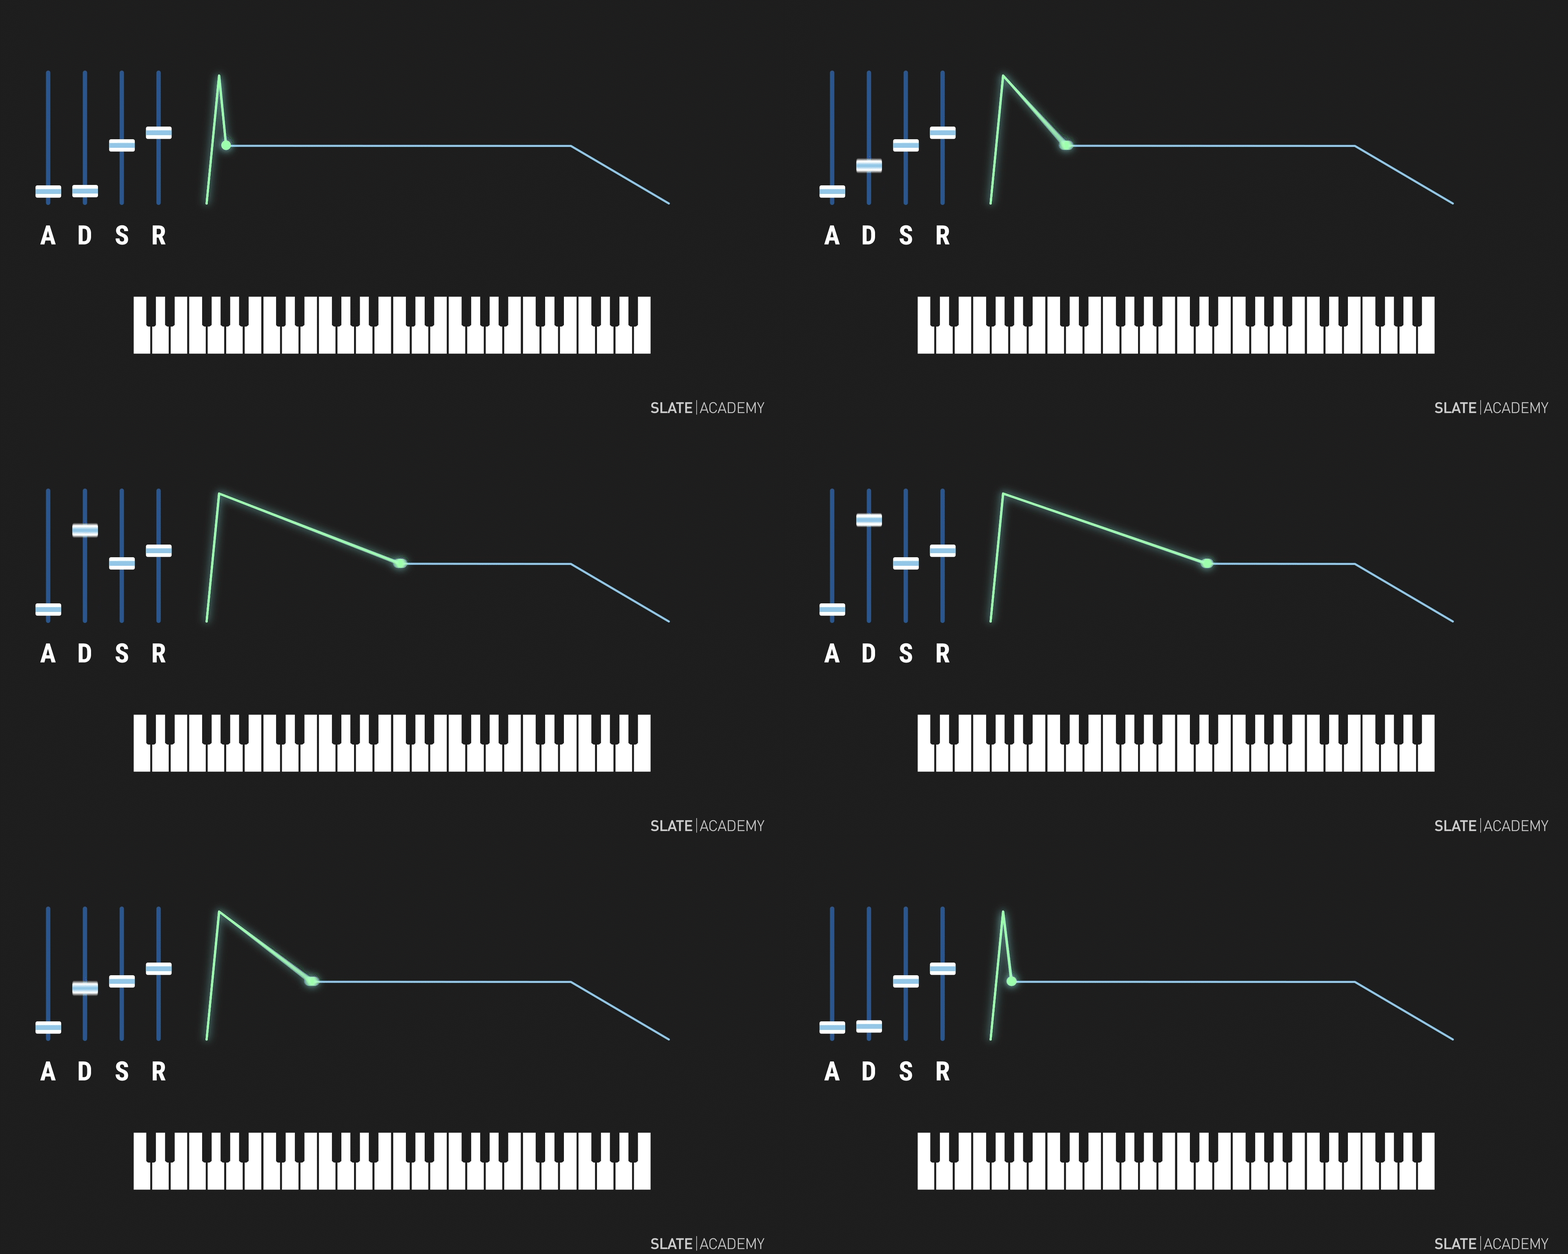
Sustain sets the output level of the middle section of the envelope, and is measured in dB. Decay controls the time it takes for the signal to reach the sustain level after it reaches maximum amplitude. As I’m sure you can guess, a fast decay will produce a quicker drop to the set sustain level. Slow decay? Slower descent.
Sustain
Decay
Last but definitely not least, the release controls how long it takes the synth to go from the set sustain level back down to 0 dB after the key is released. To produce an almost-instant cutoff, you’d want a faster release. If you wanted a more dramatic fade (perfect for a pad), the slower release is your best bet.
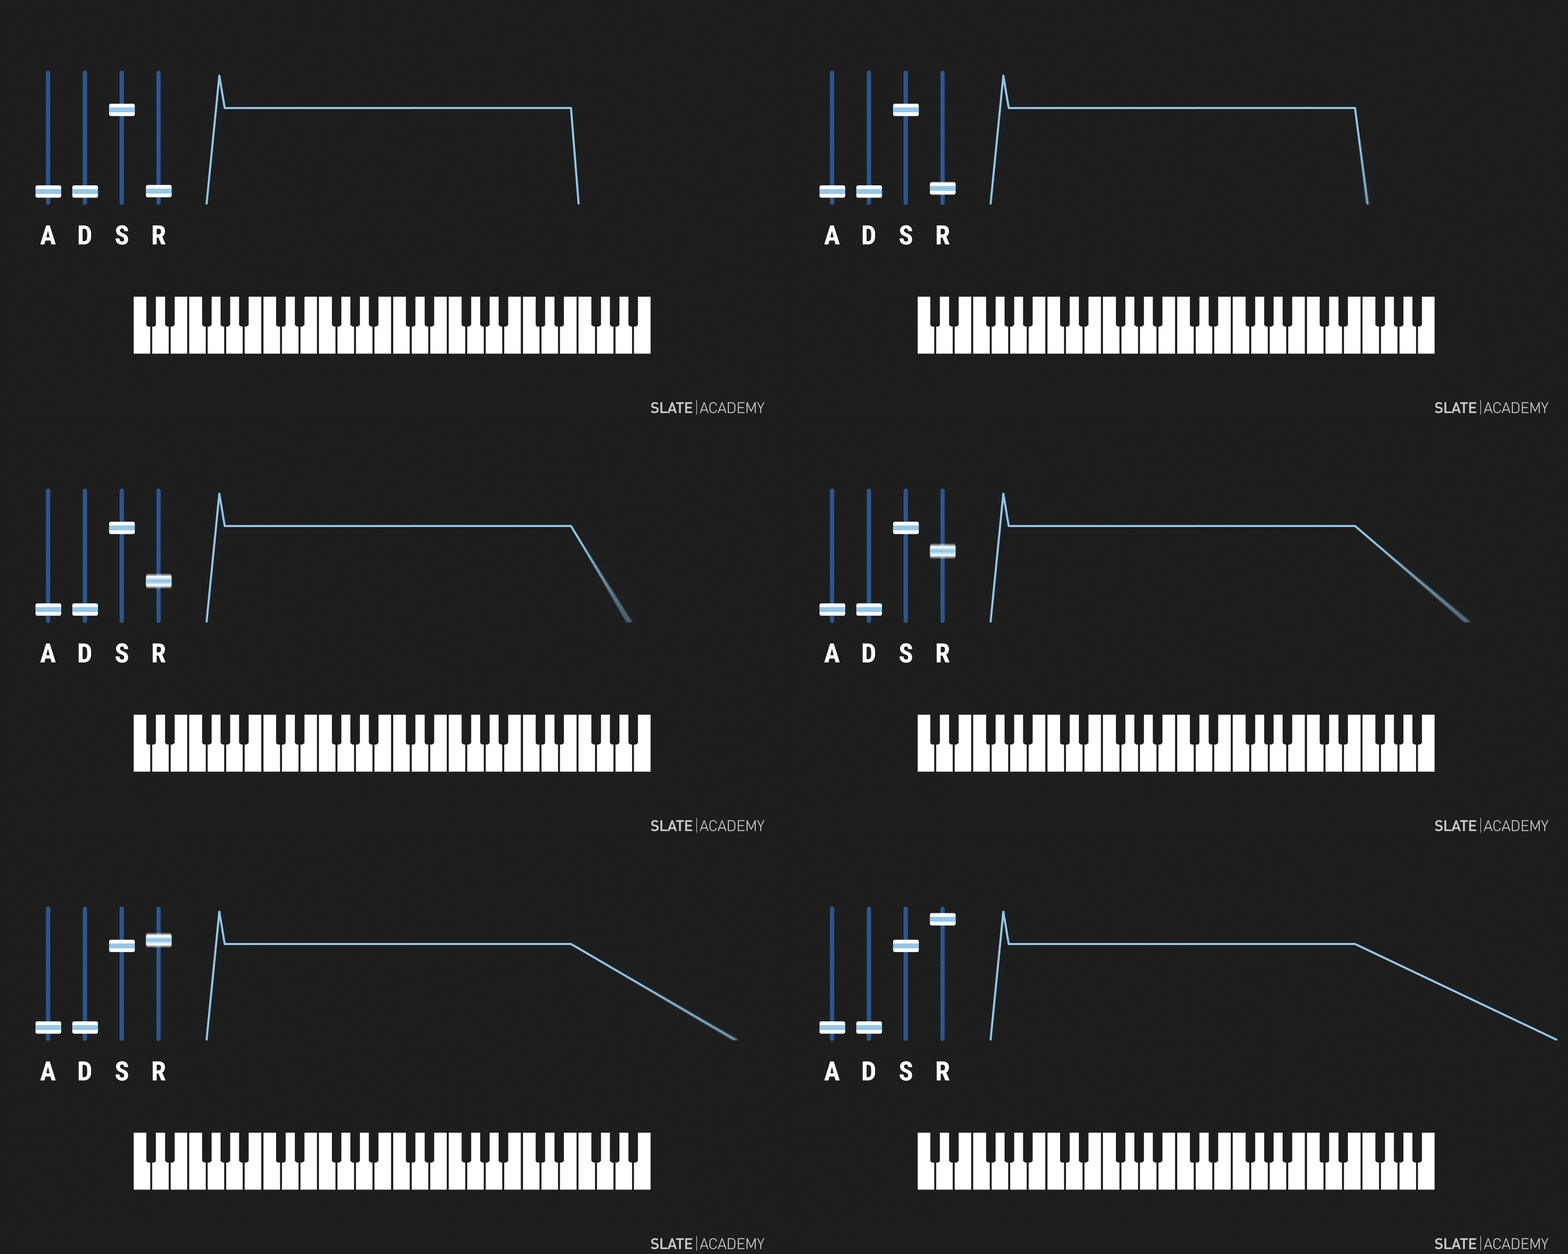
Release
Envelopes, though, are just the tip of the modulation iceberg…
Let’s talk LFO’s.
An LFO, or “low frequency oscillator,” is always running in the background at subsonic frequencies, often between 0.1 Hz and 20 Hz—too low for humans to hear. Totally separate from the synth’s sound generating oscillators, LFO’s are only used to modulate different parameters.
An LFO allows you to even further manipulate your sounds with just a few simple controls. First, you need to select your LFO’s target, or the parameter you want the LFO to modulate. Your target can be almost any control on the synth, from pitch to overall volume.
Once you’ve selected your target, you’ll select your shape, which affects the way the LFO modulates it. Usually, these waveshapes will match those discussed in part one: sine, square, triangle and sawtooth. Just as each waveshape generates a different sound in the main oscillator, each LFO shape will shape your sound in a unique way.
Suppose you had set your synth’s pitch control as the LFO target. If you were to hold down a single key, any change in pitch would come from the LFO, and each shape would affect that pitch differently.
For example, a sine wave would allow for gentler transitions from lower to higher pitches, while a square wave would be much more abrupt, as if simply alternating between the highest and lowest pitch.
The minimum and maximum range of the LFO are controlled by the depth knob. Let’s stick with our pitch control target example. The depth, then, would control the highest and lowest pitch the LFO will reach.
Finally, we have the LFO’s rate, which determines the speed of the LFO. Sticking with our pitch target example, the higher you set the rate, the faster the LFO changes the pitch. Similarly, the lower the rate, the longer the sweep from lower to higher octaves.
While the LFO’s main controls do most of the heavy lifting, there are two other controls that you should keep in mind.
There’s a good chance your LFO has a loop button. The loop button simply means that, when engaged, the LFO is constantly running in the background. When you press and hold a key, it will loop continuously until the key is disengaged. If you disable looping, the LFO will only trigger once.
The retrigger button tells the LFO to always start at the beginning of the cycle when a new key is pressed. When retrigger is off, the LFO picks up at any point in the cycle when a new key is played, running constantly in the background.
By now, you should feel pretty confident about opening up a virtual synth like ANA 2 Ultra and finding your way around the interface. In the third and final section of our Intro to Synthesis series, we’ll cover built-in effects and the role they play in shaping your sound in the box.
